• Skip to primary navigation
  • Skip to main content
  • Skip to primary sidebar

My New England Seoul

  • About
    • About
  • Adoption
    • Growing up white….kinda
    • My Birth Family Search
      • Home
  • Lifestyle
  • Farmhouse
You are here: Home / Archives for Farmhouse

Farmhouse

Dramatic Farmhouse Master Bathroom Gut Renovation for under $5500

September 14, 2021 by Christina

2 shares

Before and After

We bought this home knowing the bathrooms needed total makeovers. After a few ballpark quotes we knew it’d be worth our while to do the work ourselves whenever possible. Luckily, my husband has some experience with construction, plumbing and electrical and I love designing and re-creating our spaces.

Original master bathroom
Small vanity and toilet already removed in this picture but it gives you an idea of the size of the original footprint
Another view of the before
Original bathroom in early stages of demolition

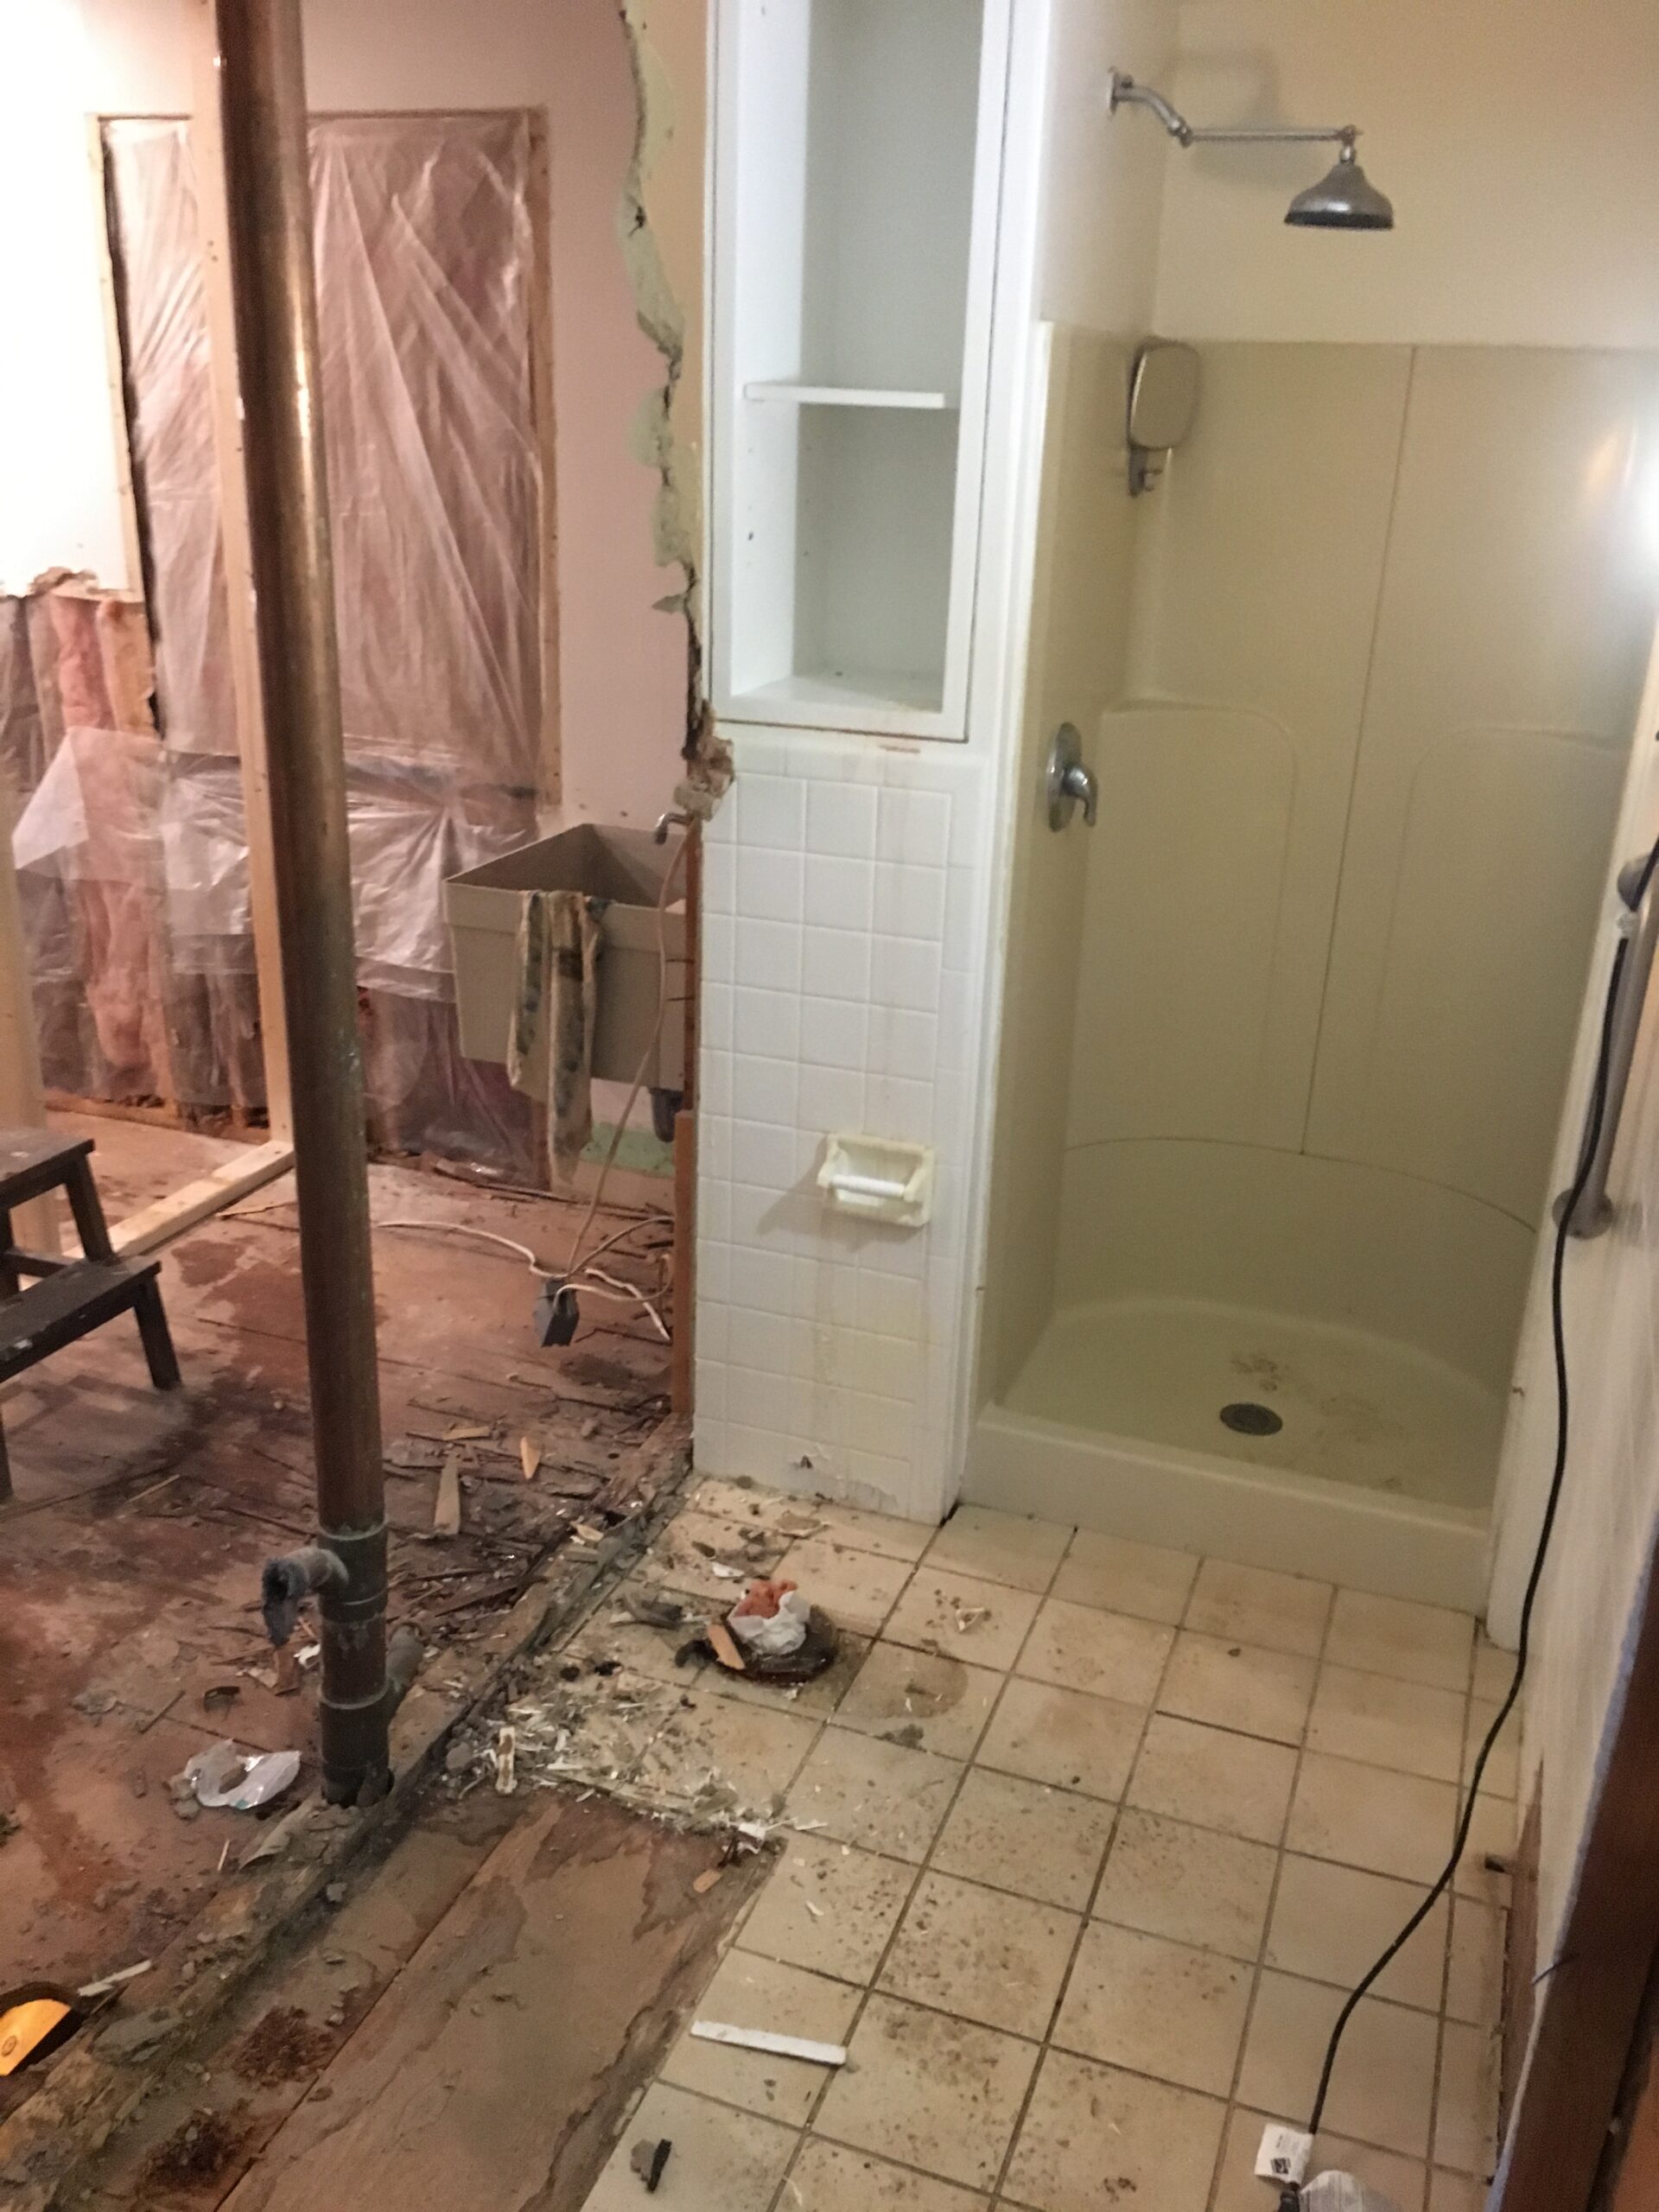
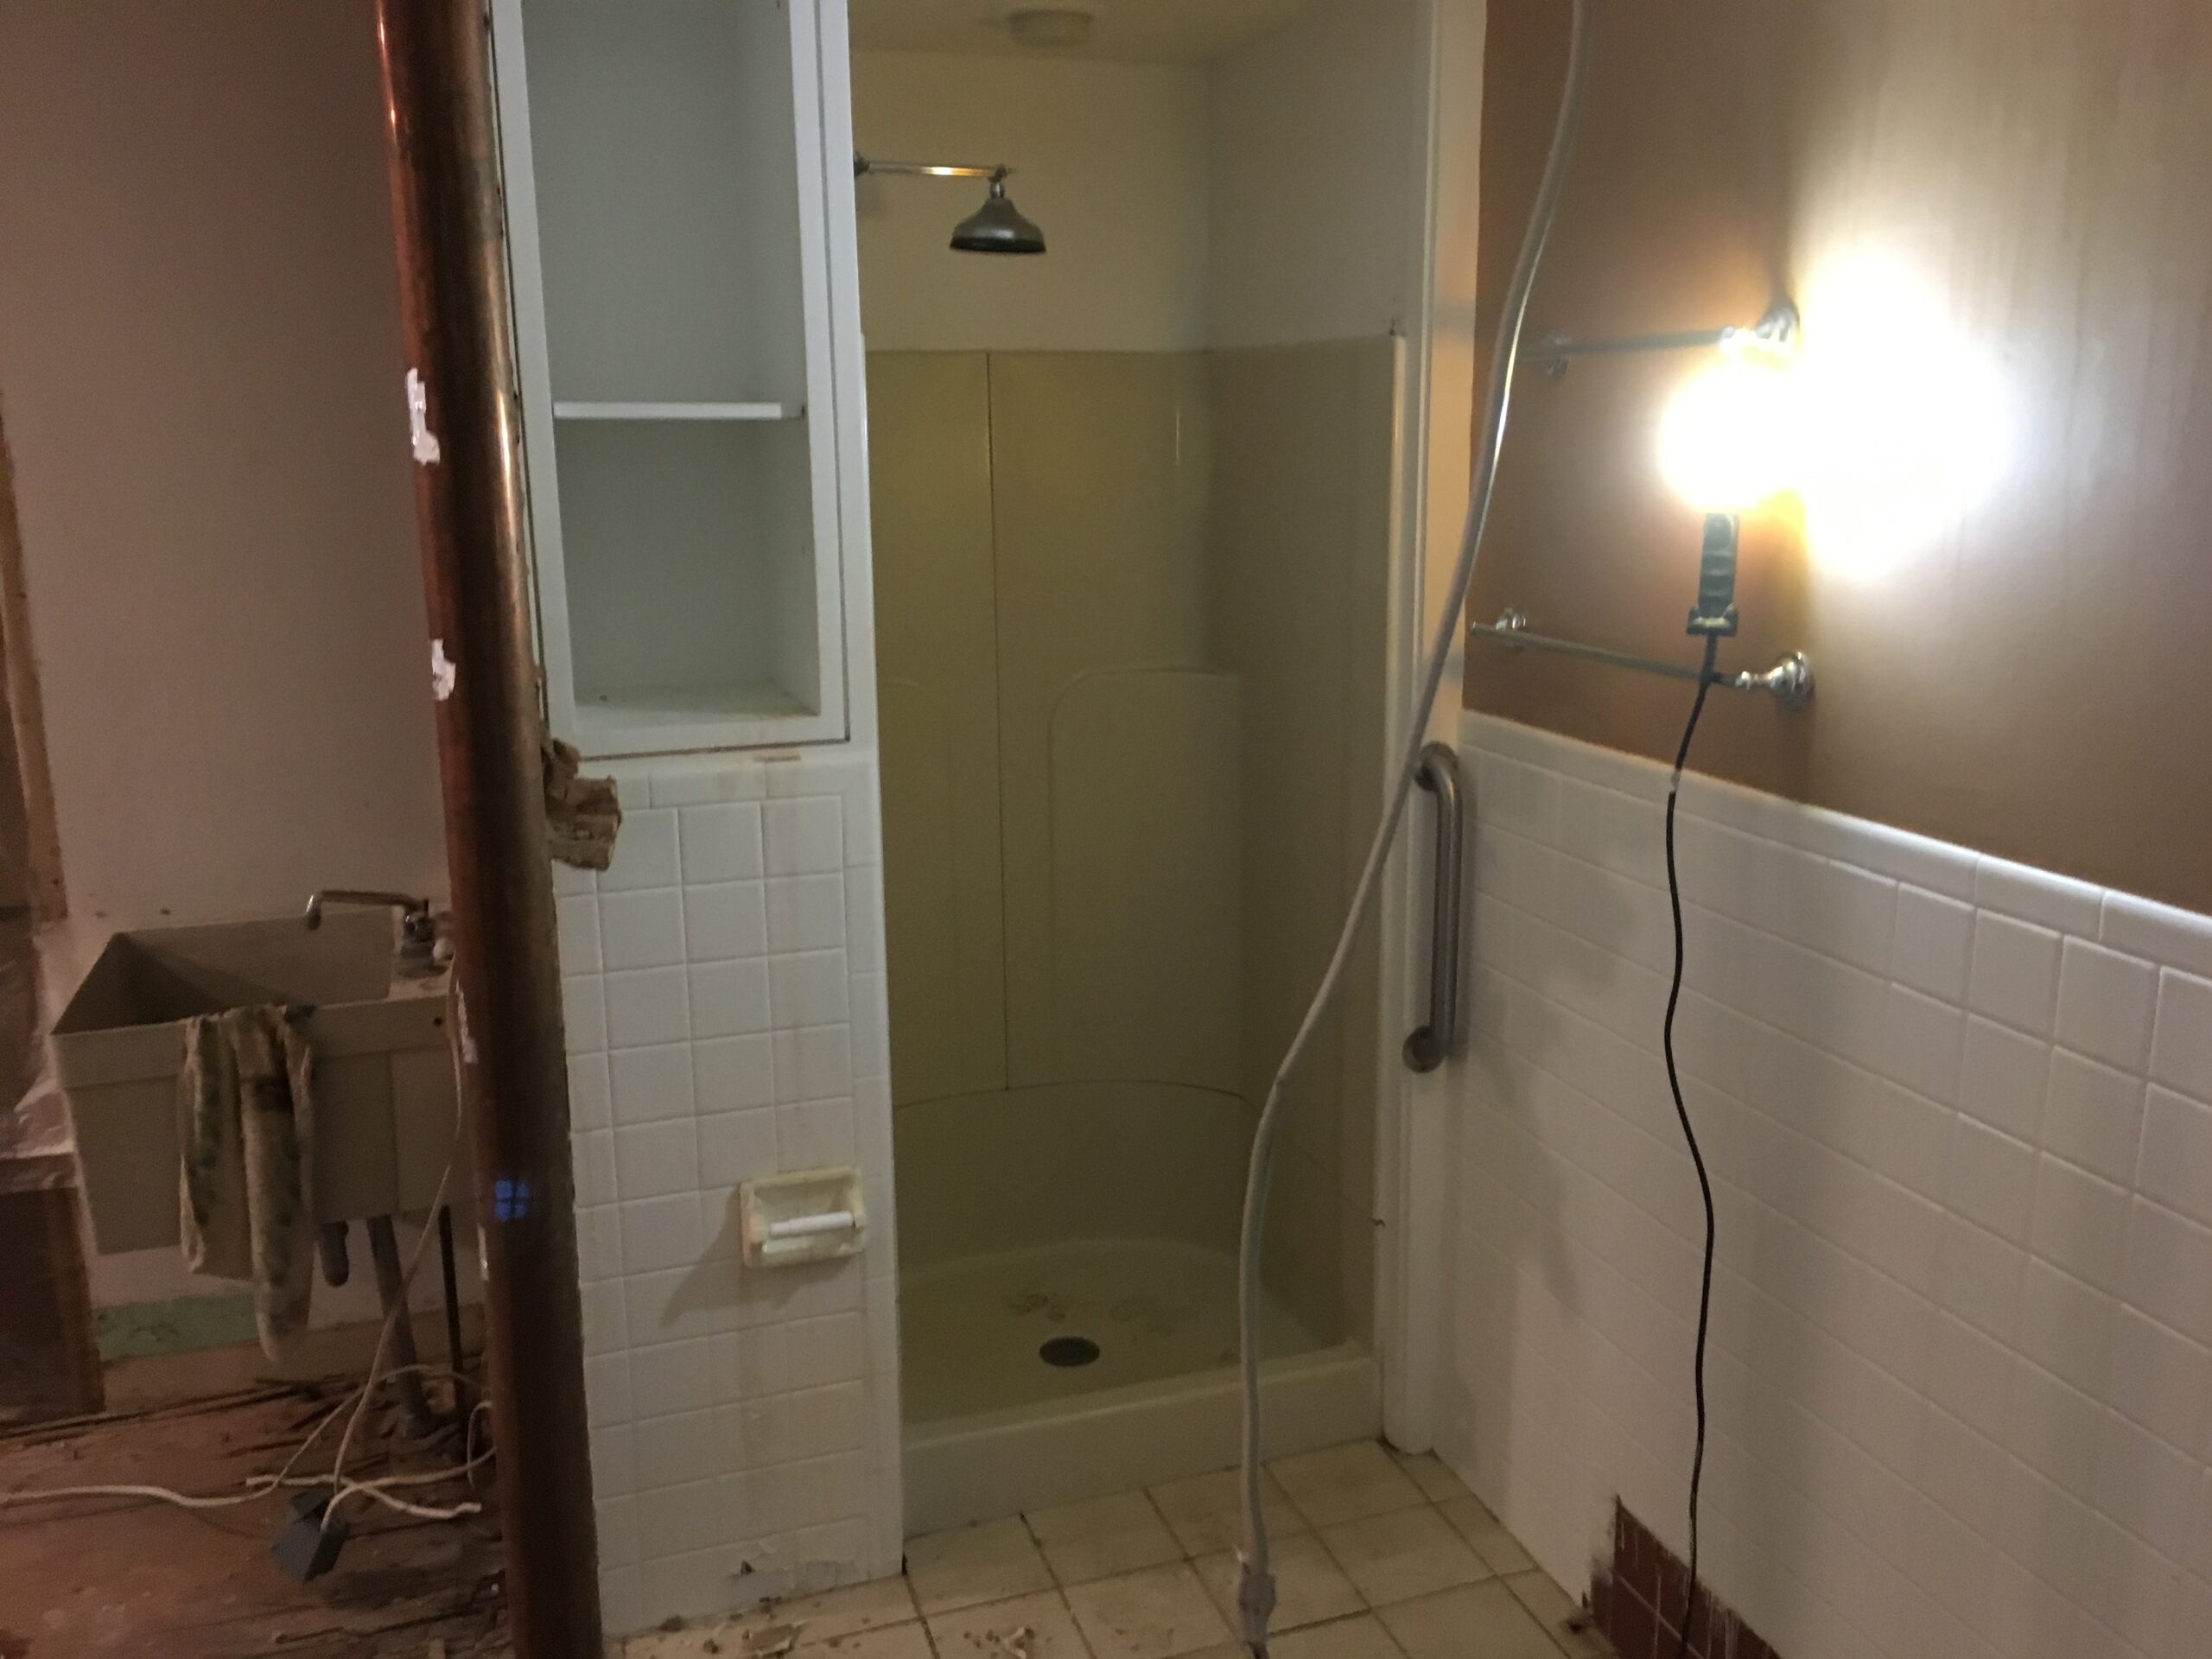
The wall between original bathroom and laundry room was removed exposing the first of many barriers in need of relocation (toilet and small vanity were already removed).

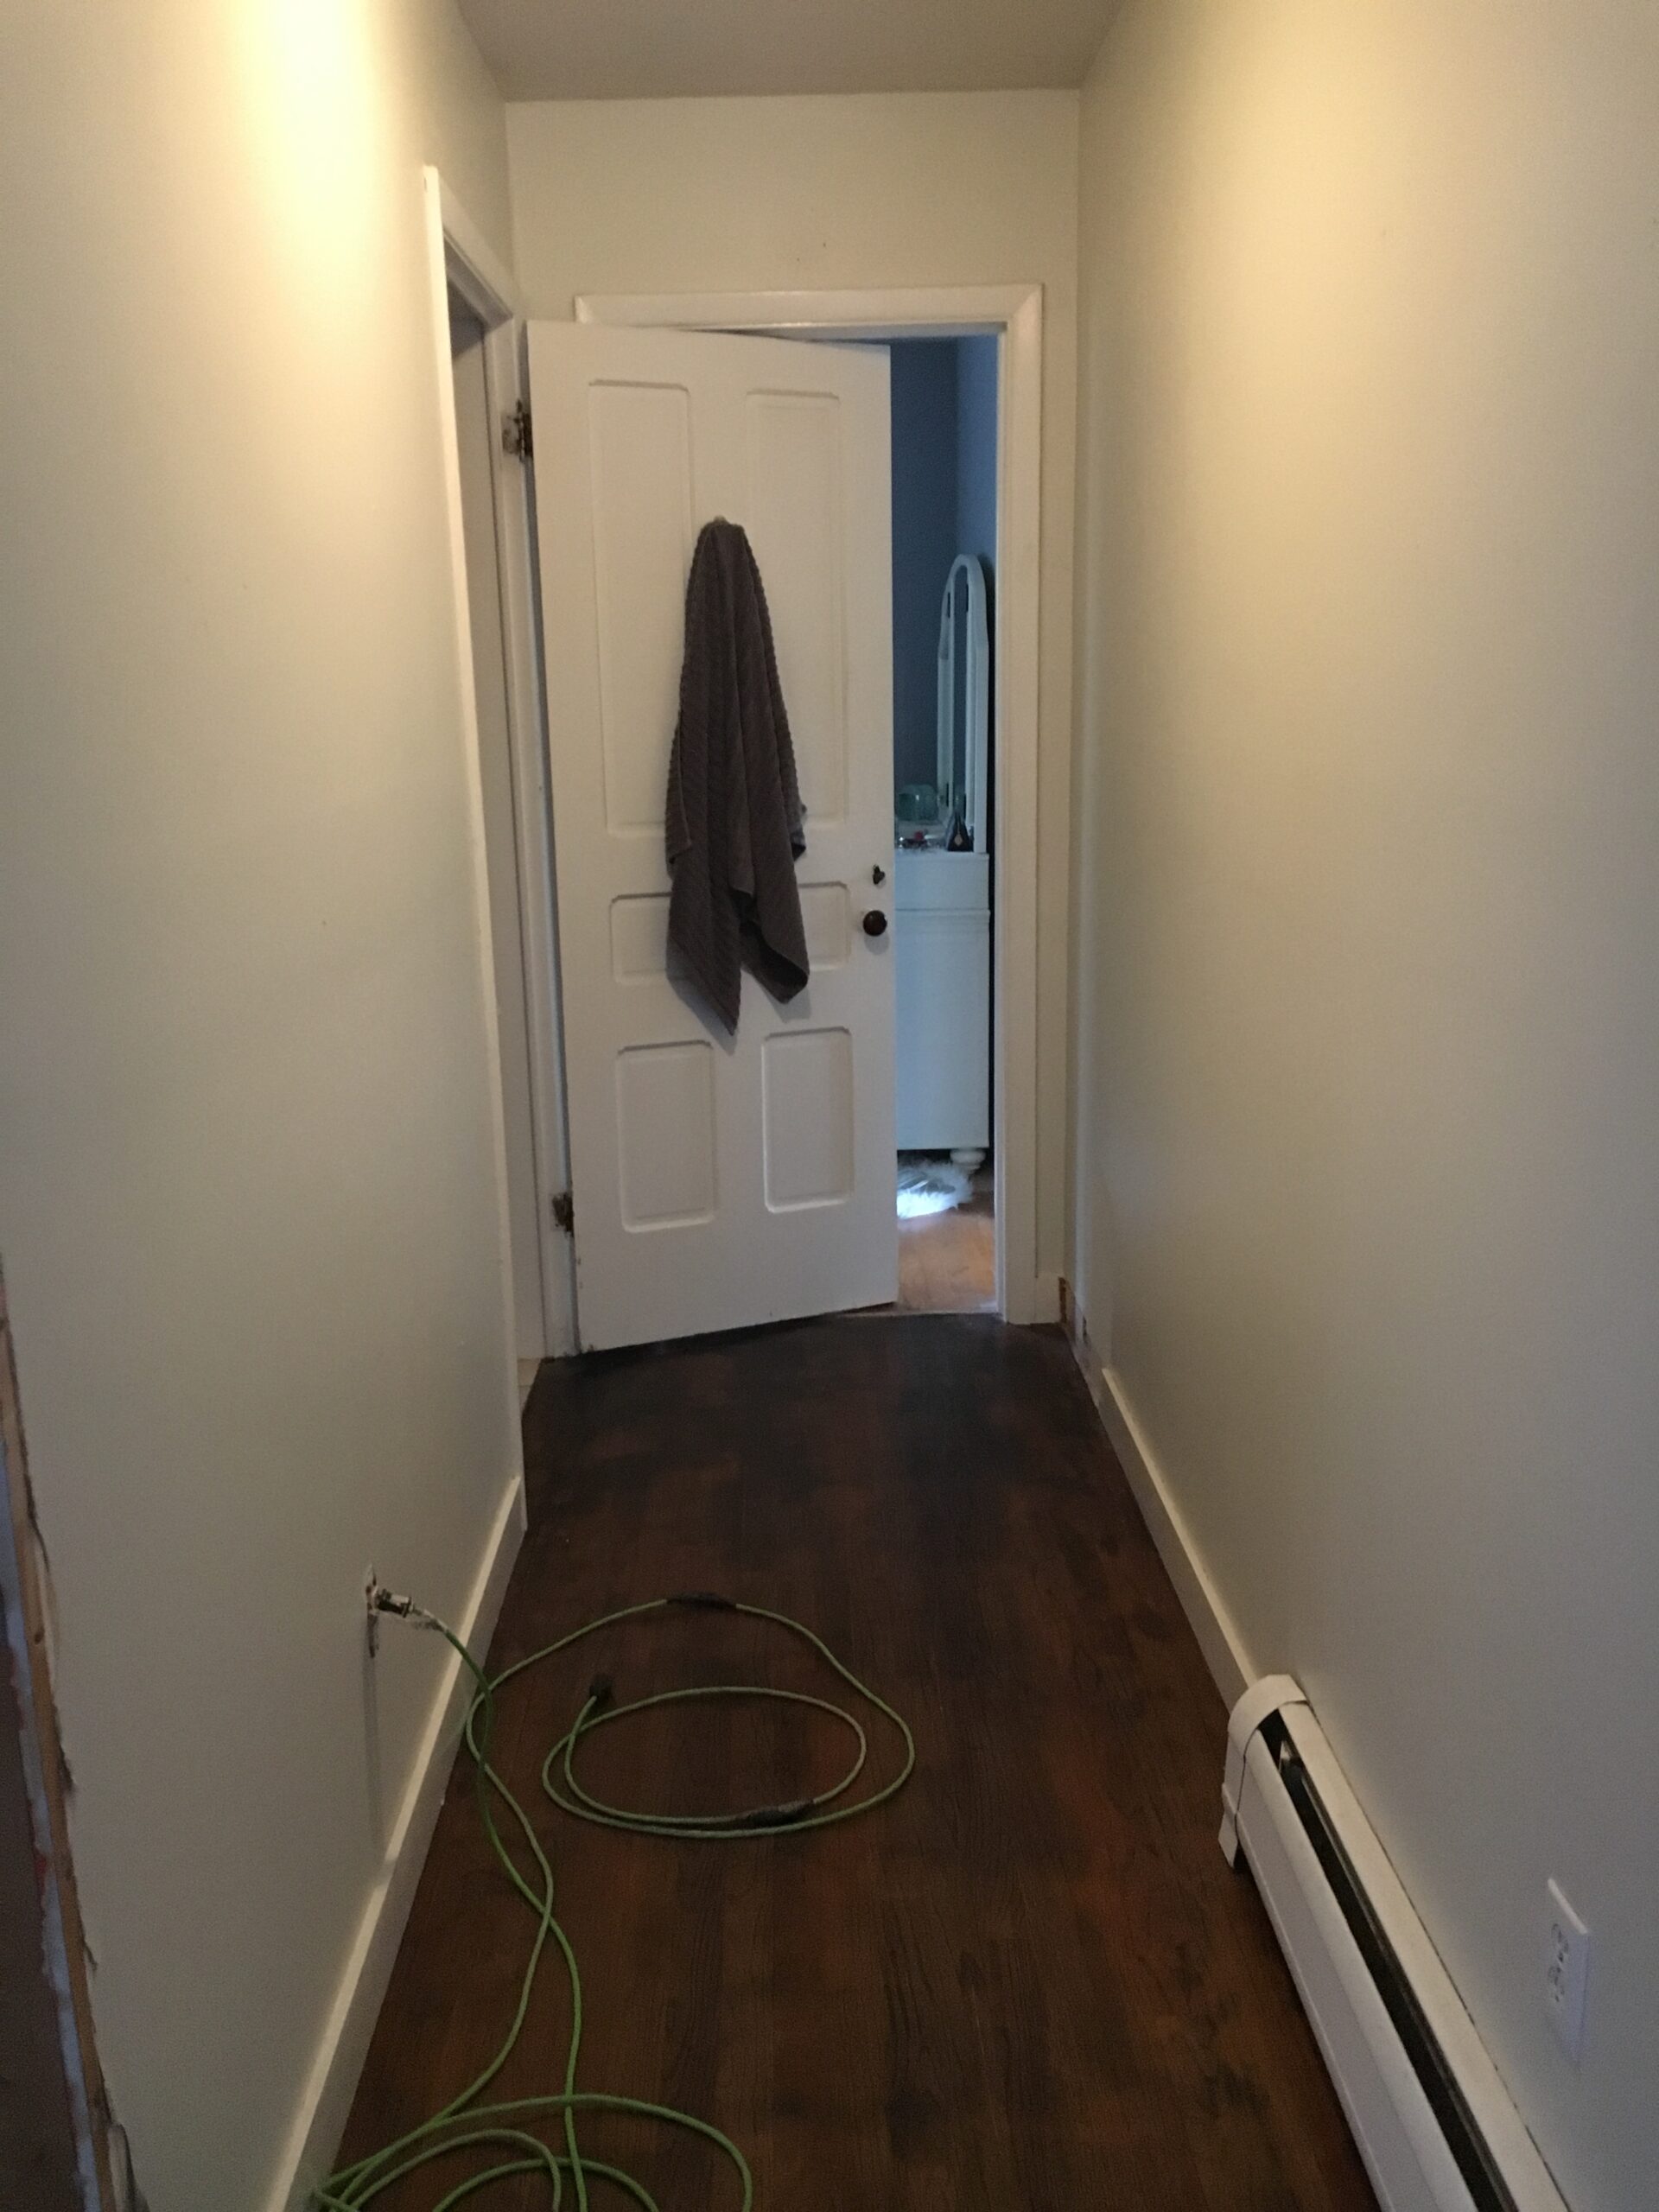
The master bathroom was originally down a hallway behind our master bedroom (picture below). It was sandwiched between a small bedroom (straight ahead in the picture) and the original laundry room (doorway left). Not seen in this photo is immediately left there was the 1st door which is an outside access. This house was built in the early 1800s and has been expanded over the years. In typical old home fashion, the rooms were small, broken up and generally lacking a feeling of flow.

Original hallway behind master bedroom seen above right

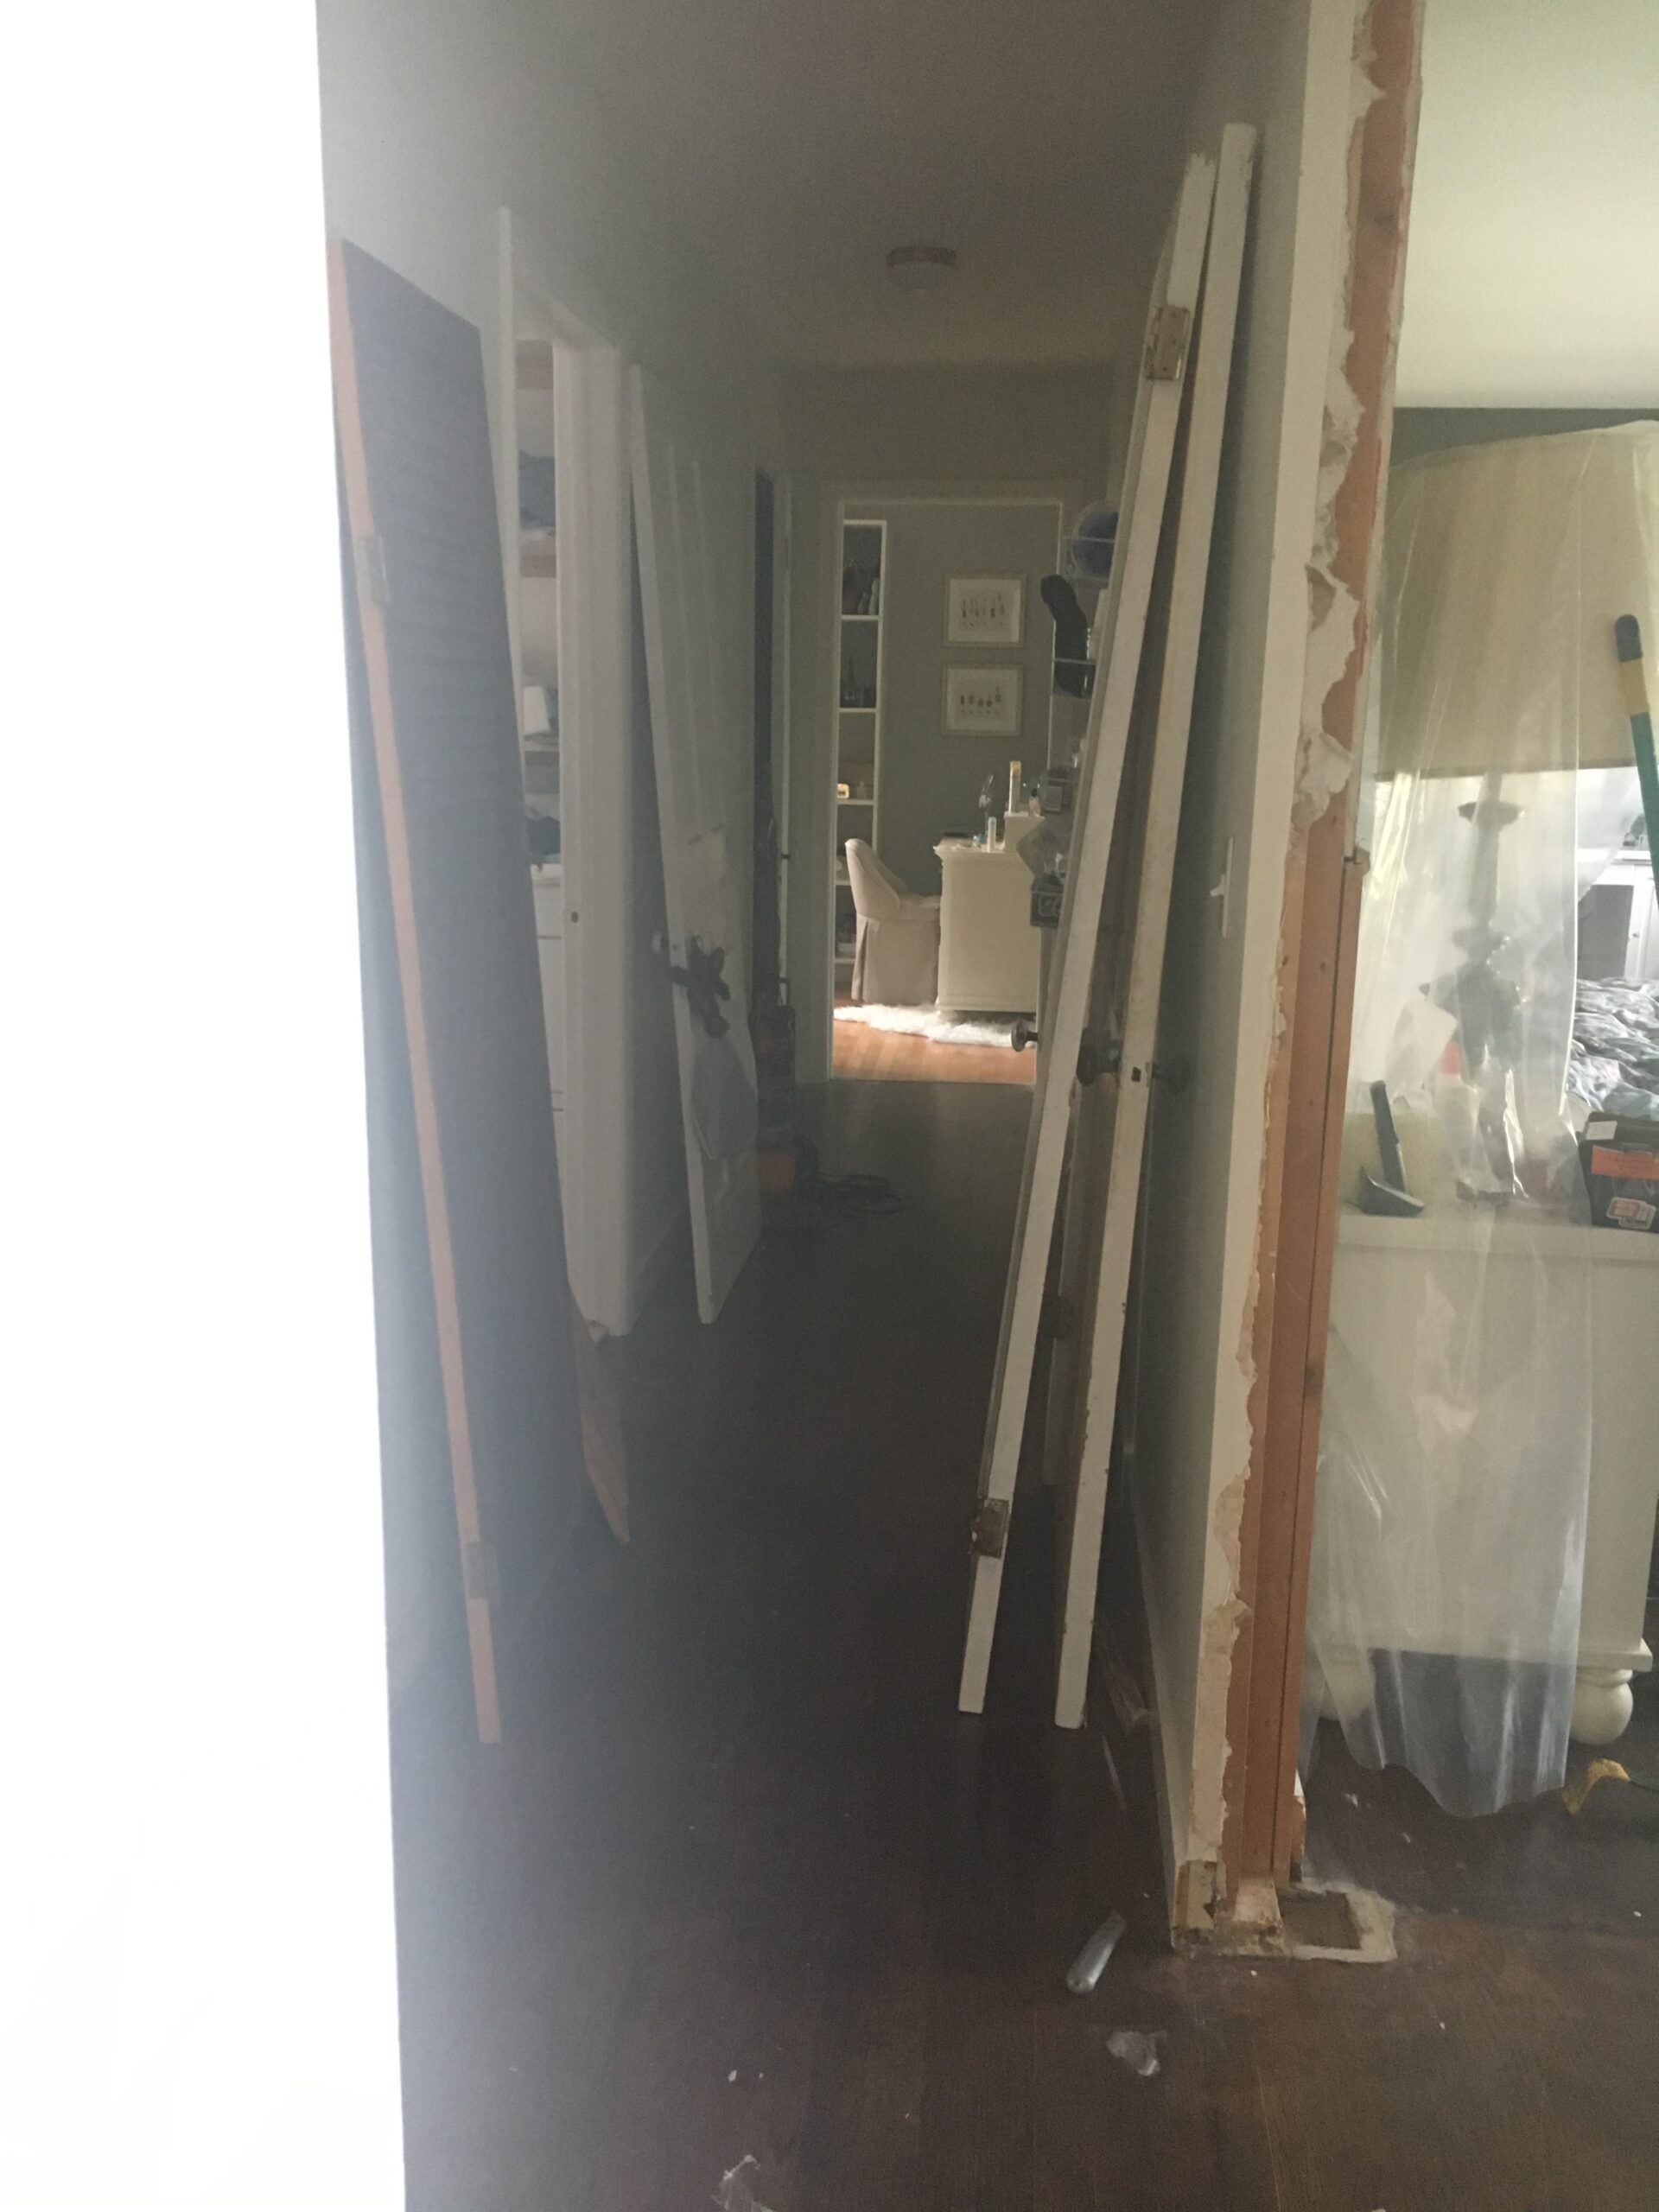
This bathroom was the 3rd of four doors in this hallway. The plan was to sacrifice the small bedroom at the end of the hallway (blog post on that coming up) and make it into a large master closet/dressing room that would connect the master bedroom with the new master bathroom.

View from within the new framed out bathroom. Visible is the new staircase opening and new laundry room on opposite side

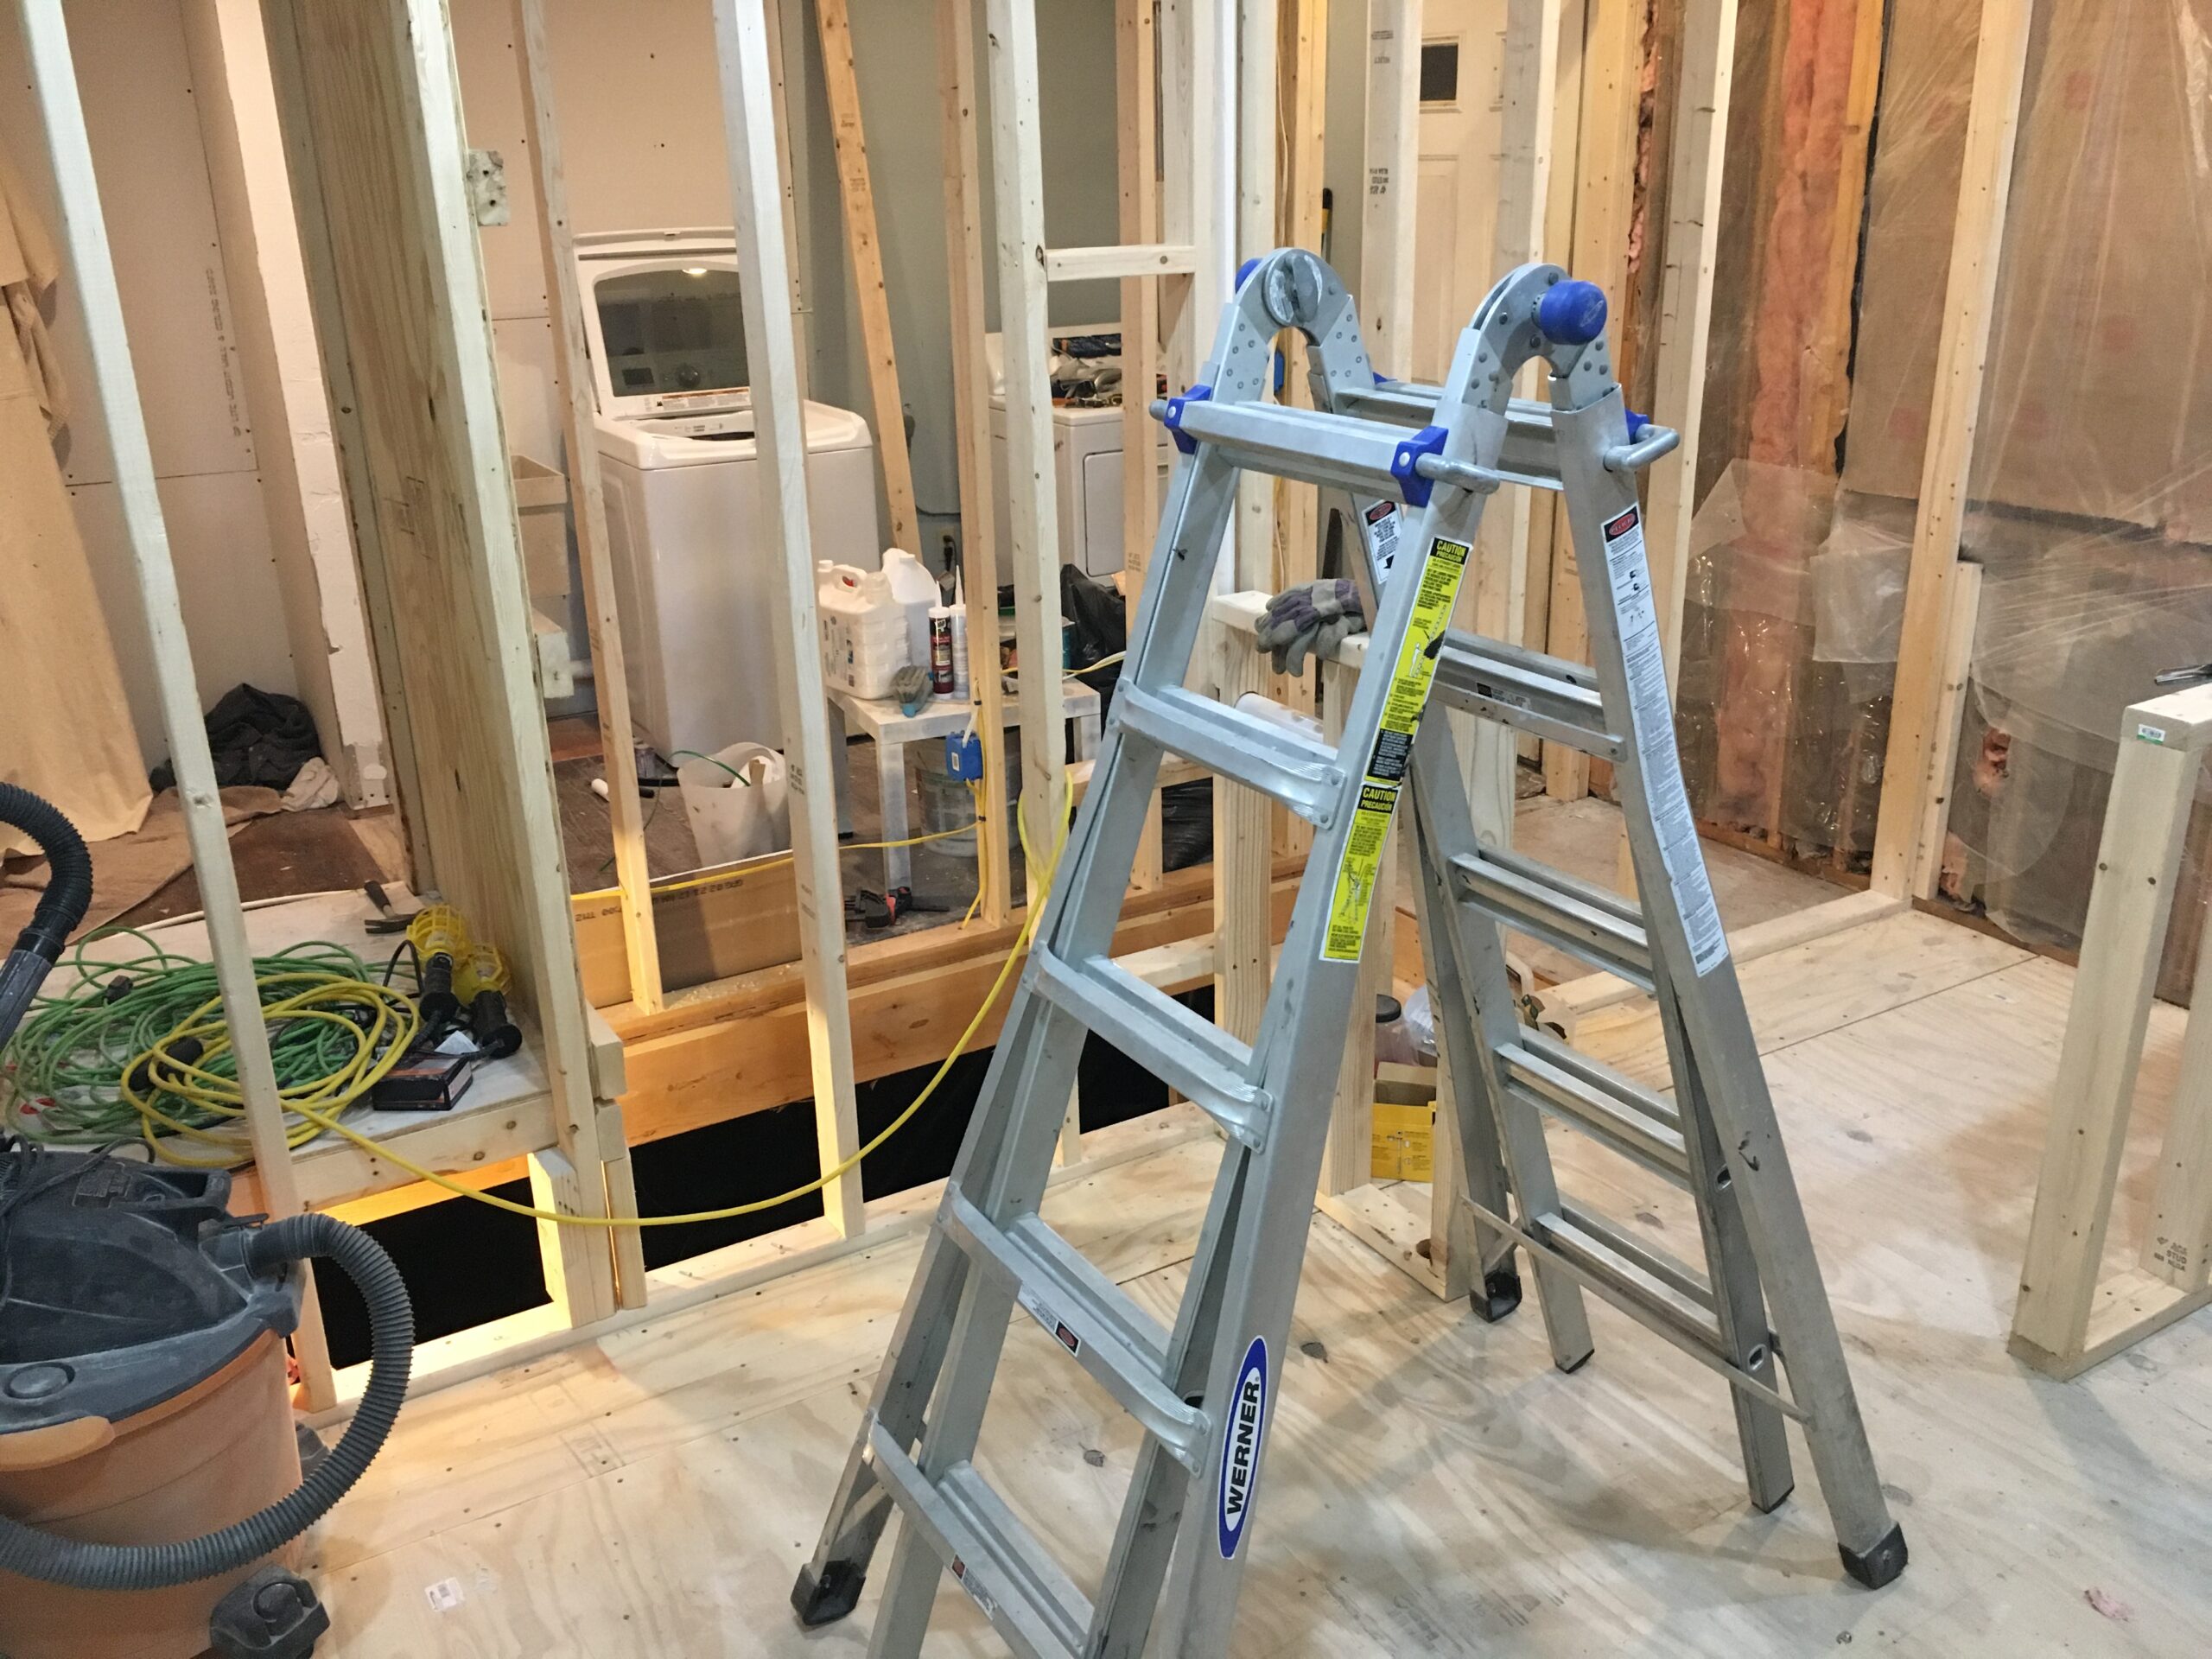
The new master bathroom footprint would include the original small bathroom, the laundry room and the hallway connecting the two rooms. We also moved the laundry room to the first room and added a new basement access staircase on this side of the house.

The demolition for this project was extensive including four rooms and a hallway. We relocated the washer/dryer as well as the utility sink from the original laundry area (seen above).

This project was much bigger than just a bathroom renovation since it included removing all of the walls separating these rooms as well as adding a staircase to the basement.

Original hallway showing small bathroom and small bedroom (behind open door)

Original hallway

New configuration showing shower half wall and toilet half walls (below)

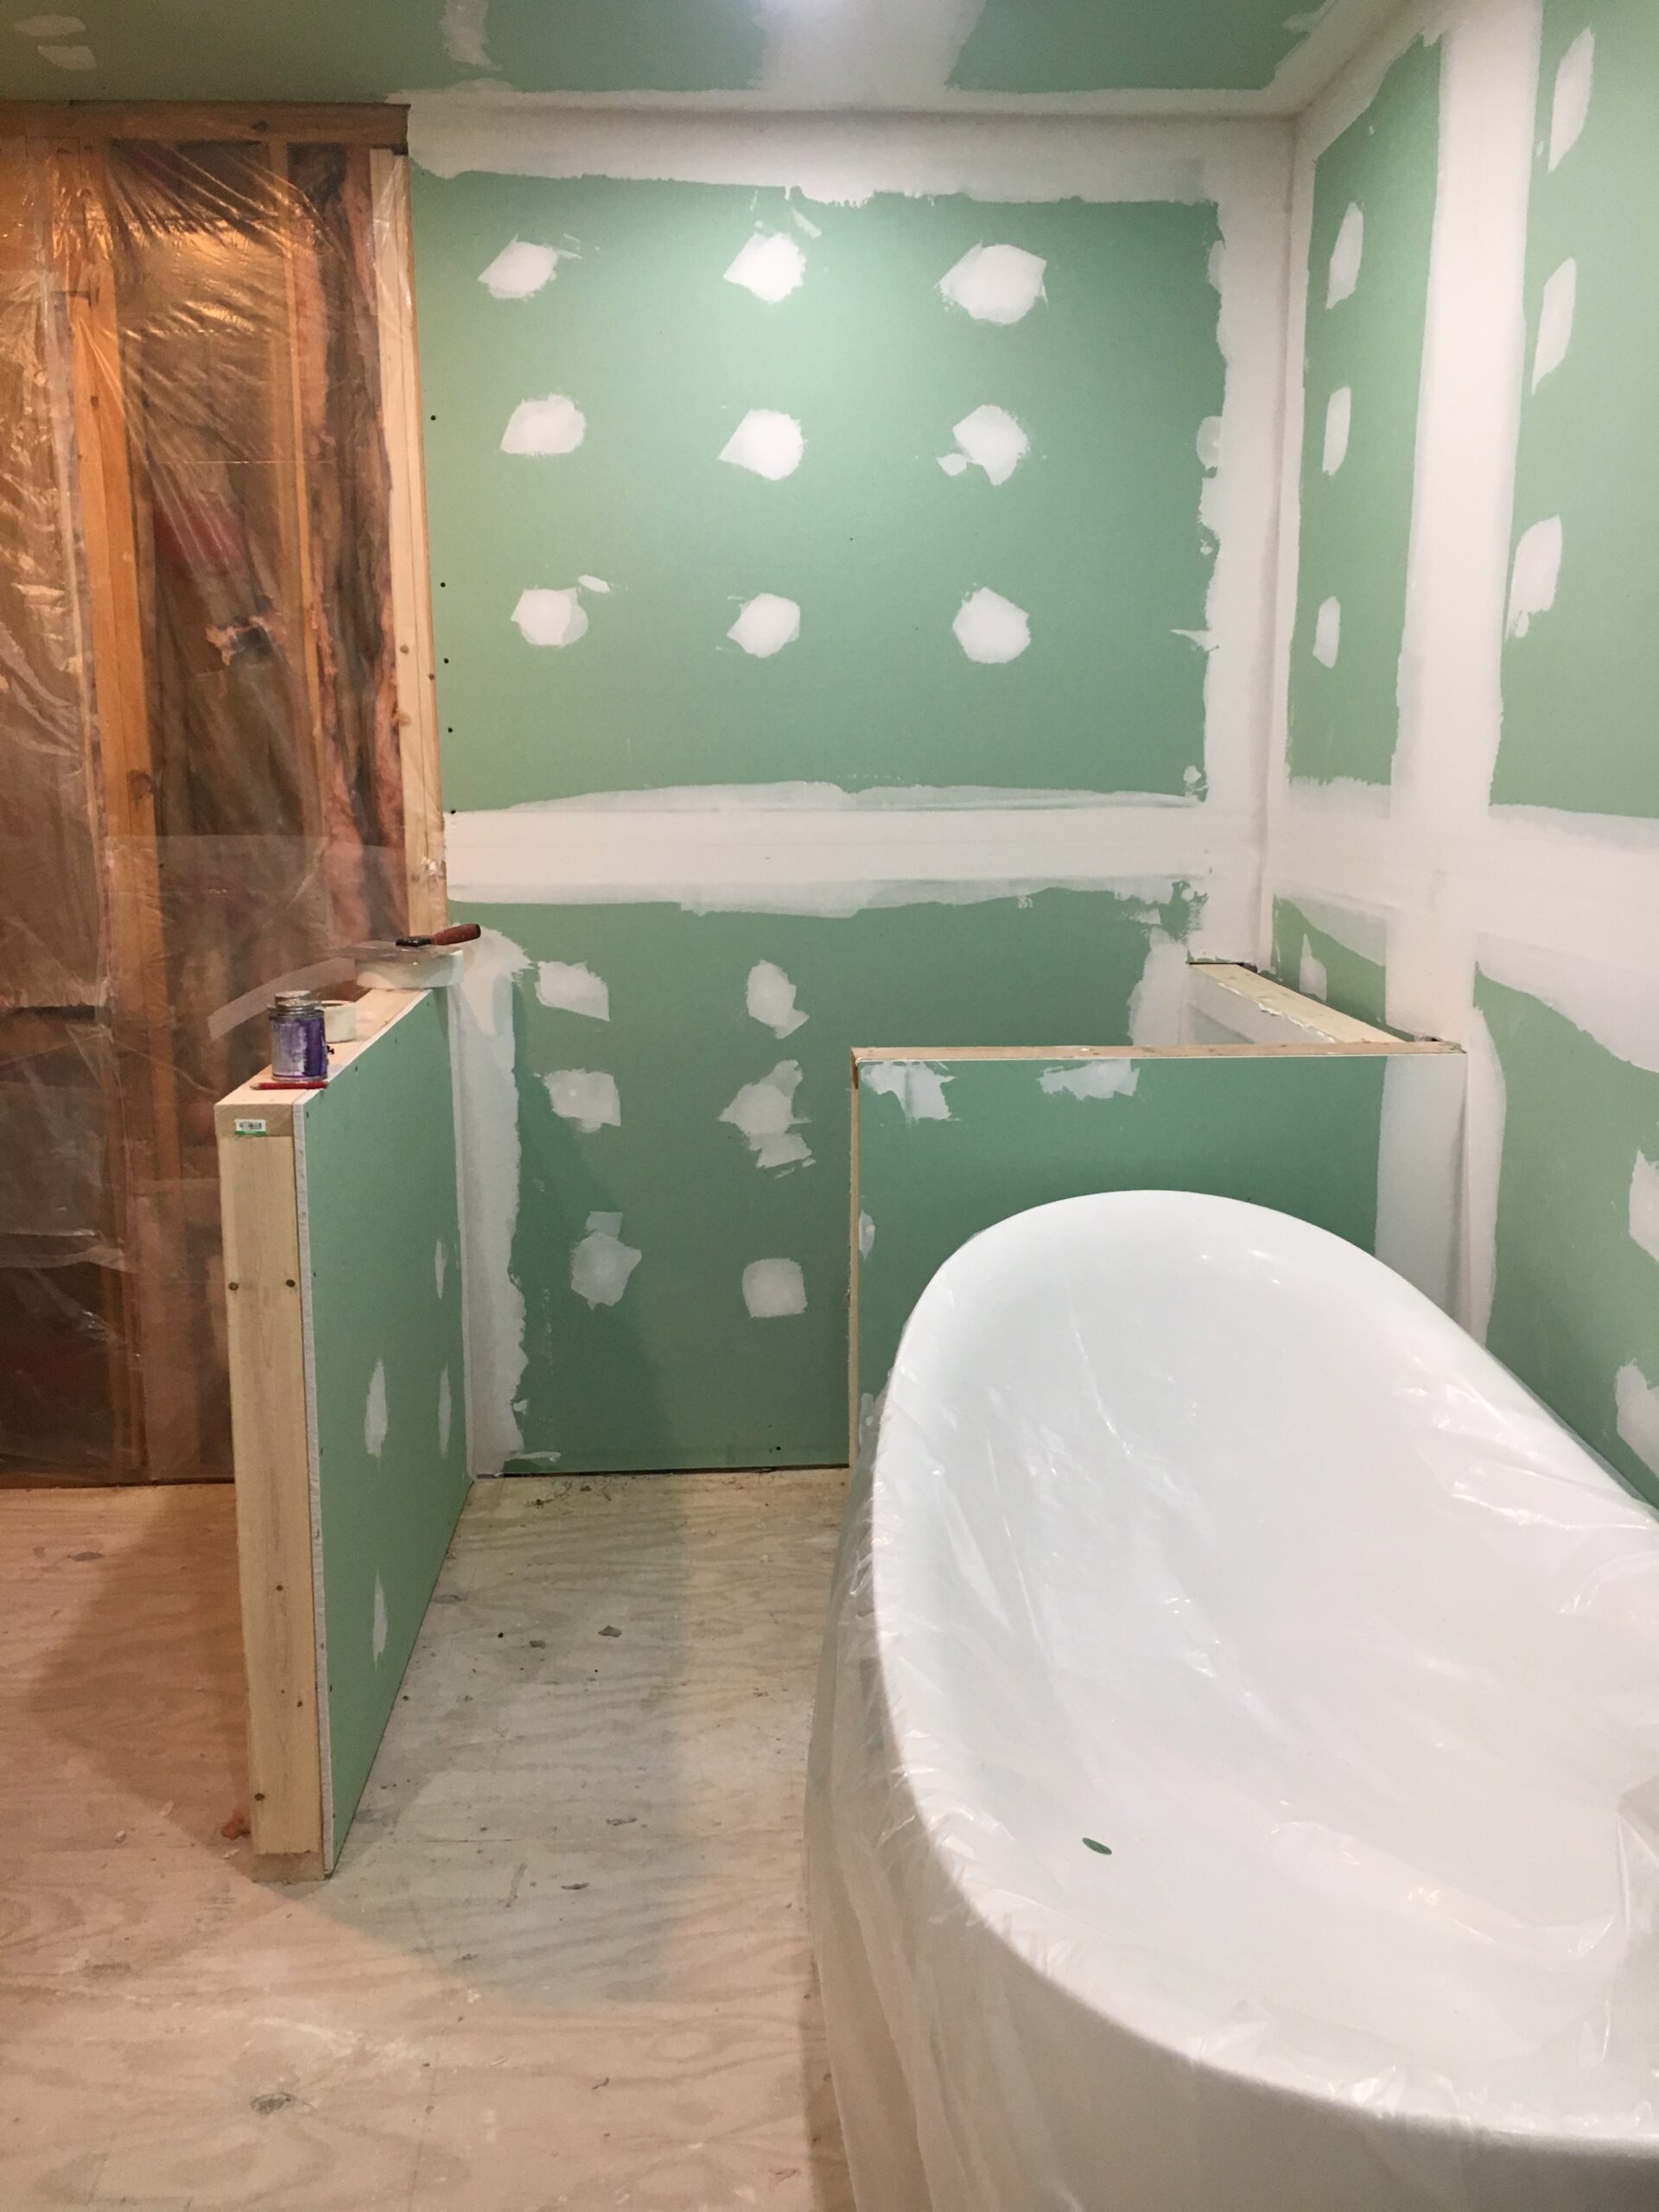
Progress on custom shower.

Custom shower progress

Soaking tub (not installed)
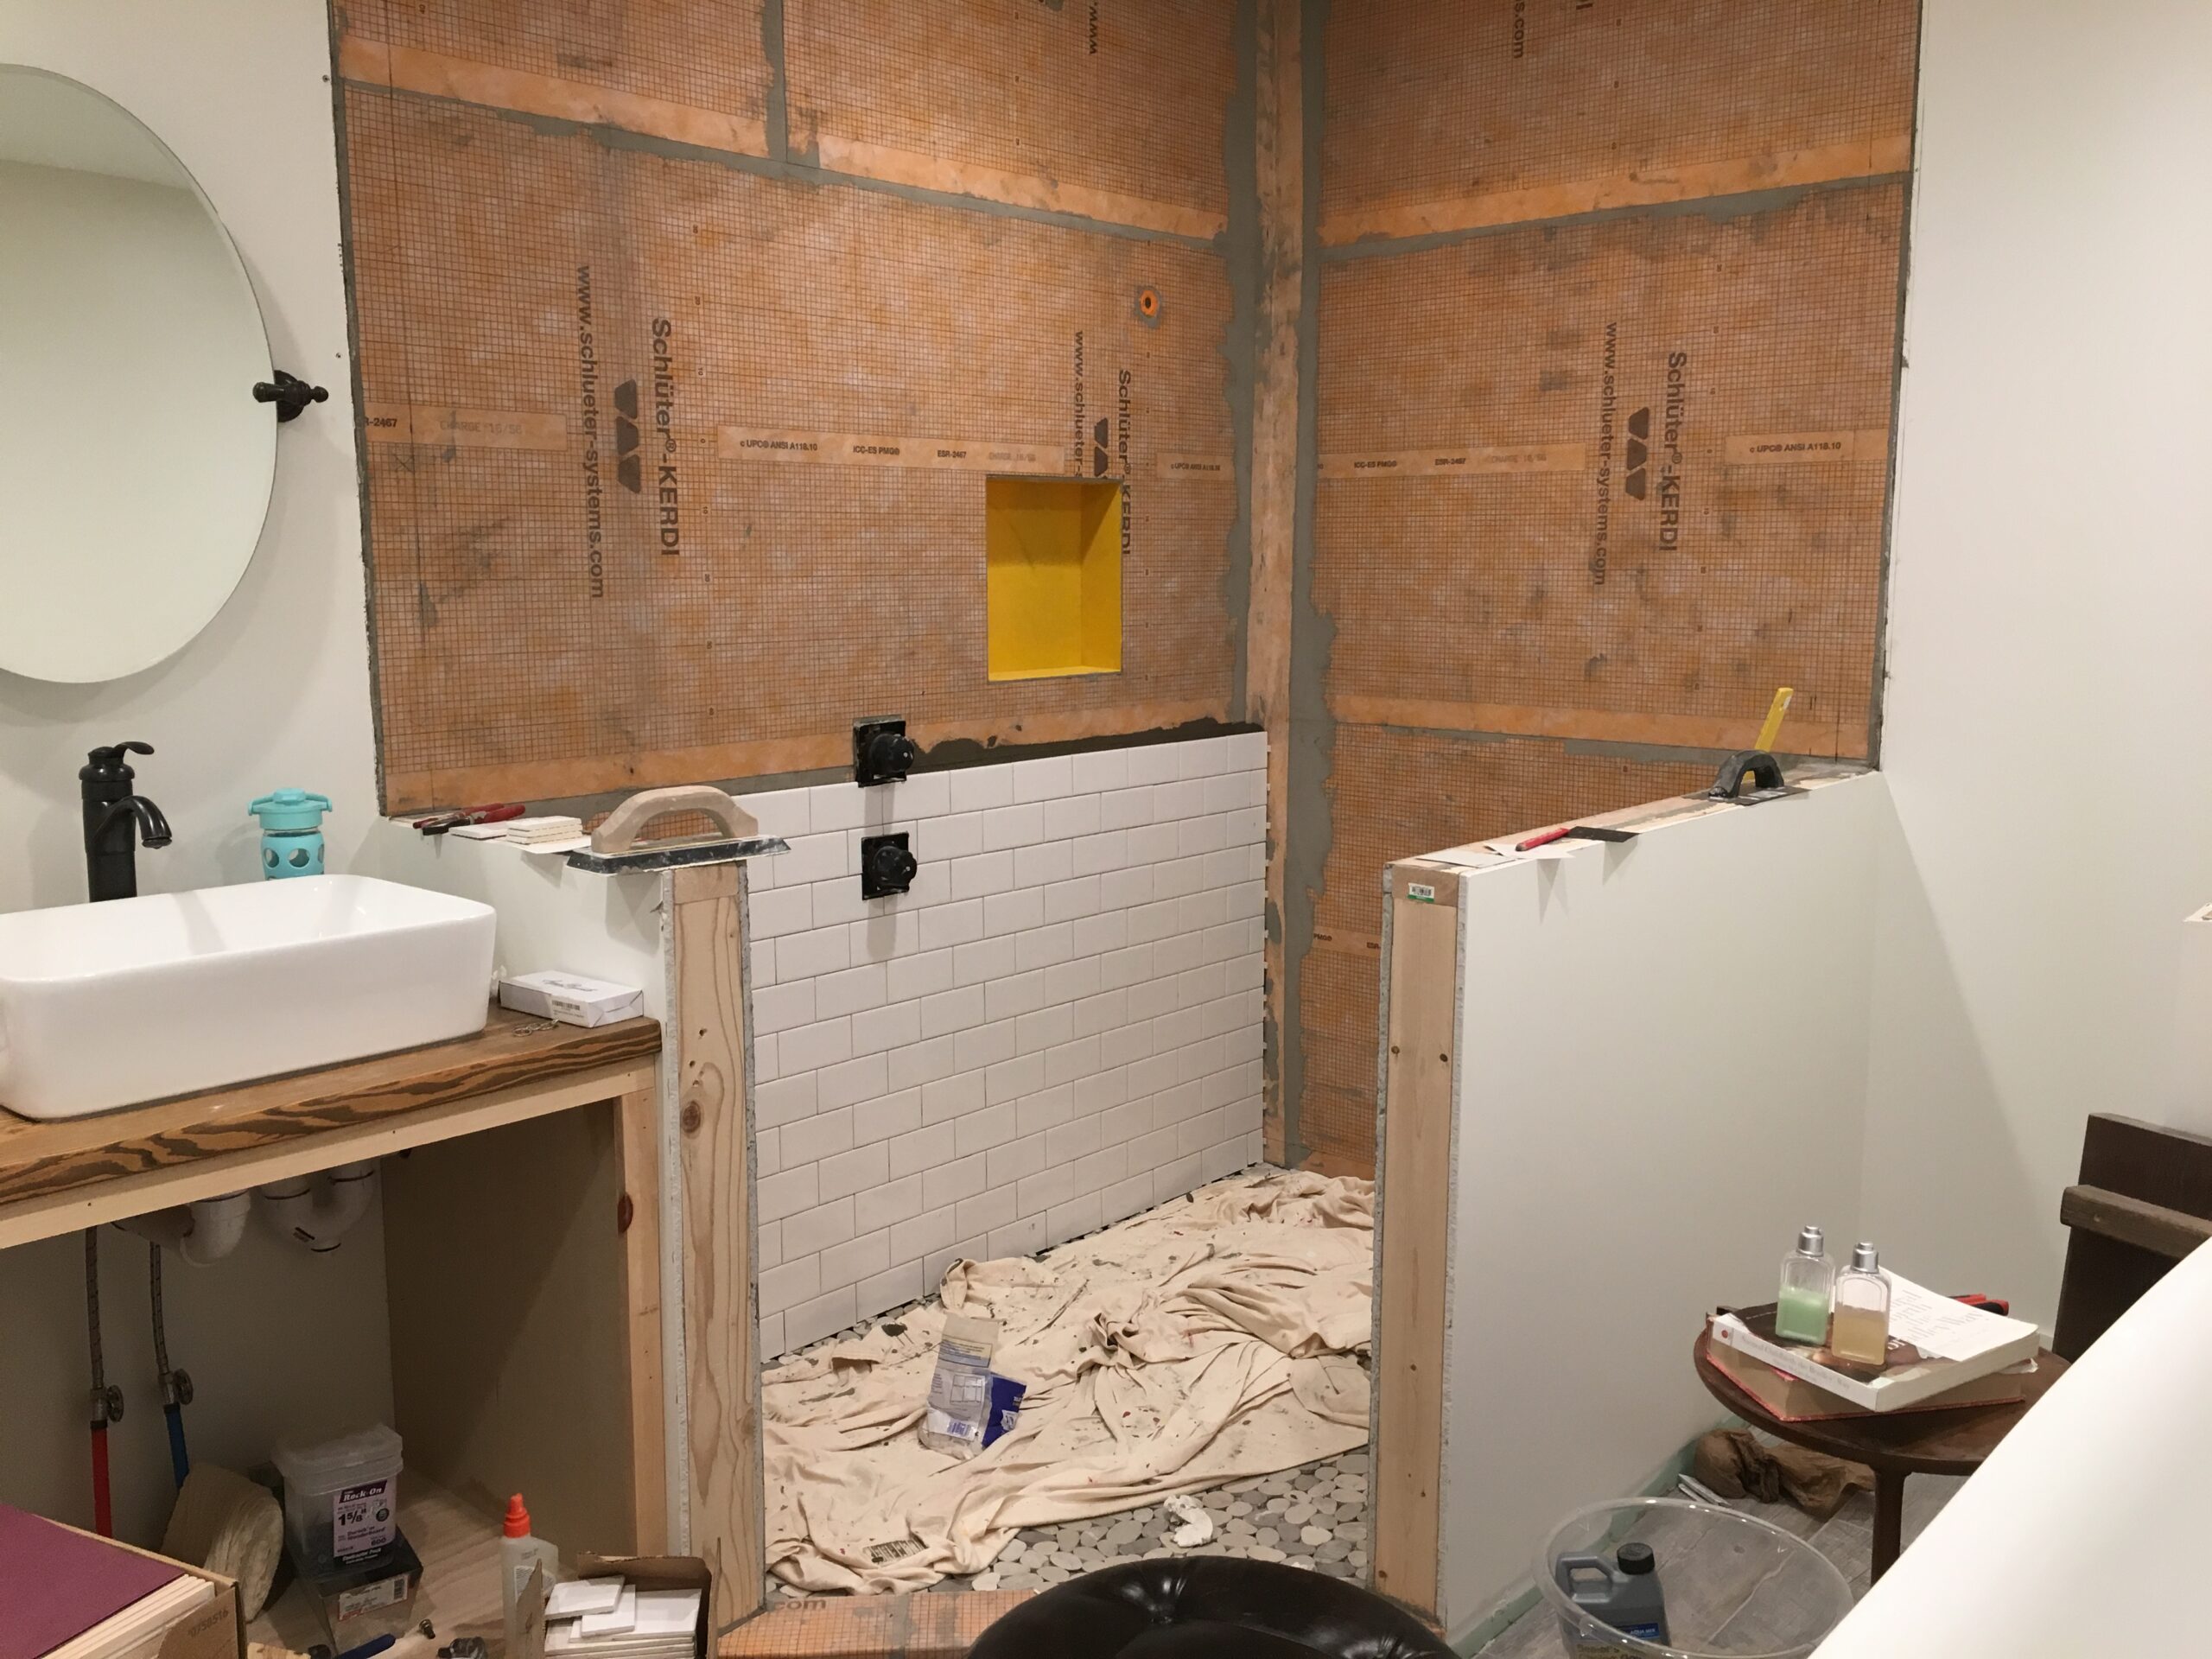
Flooring going in

New tile flooring

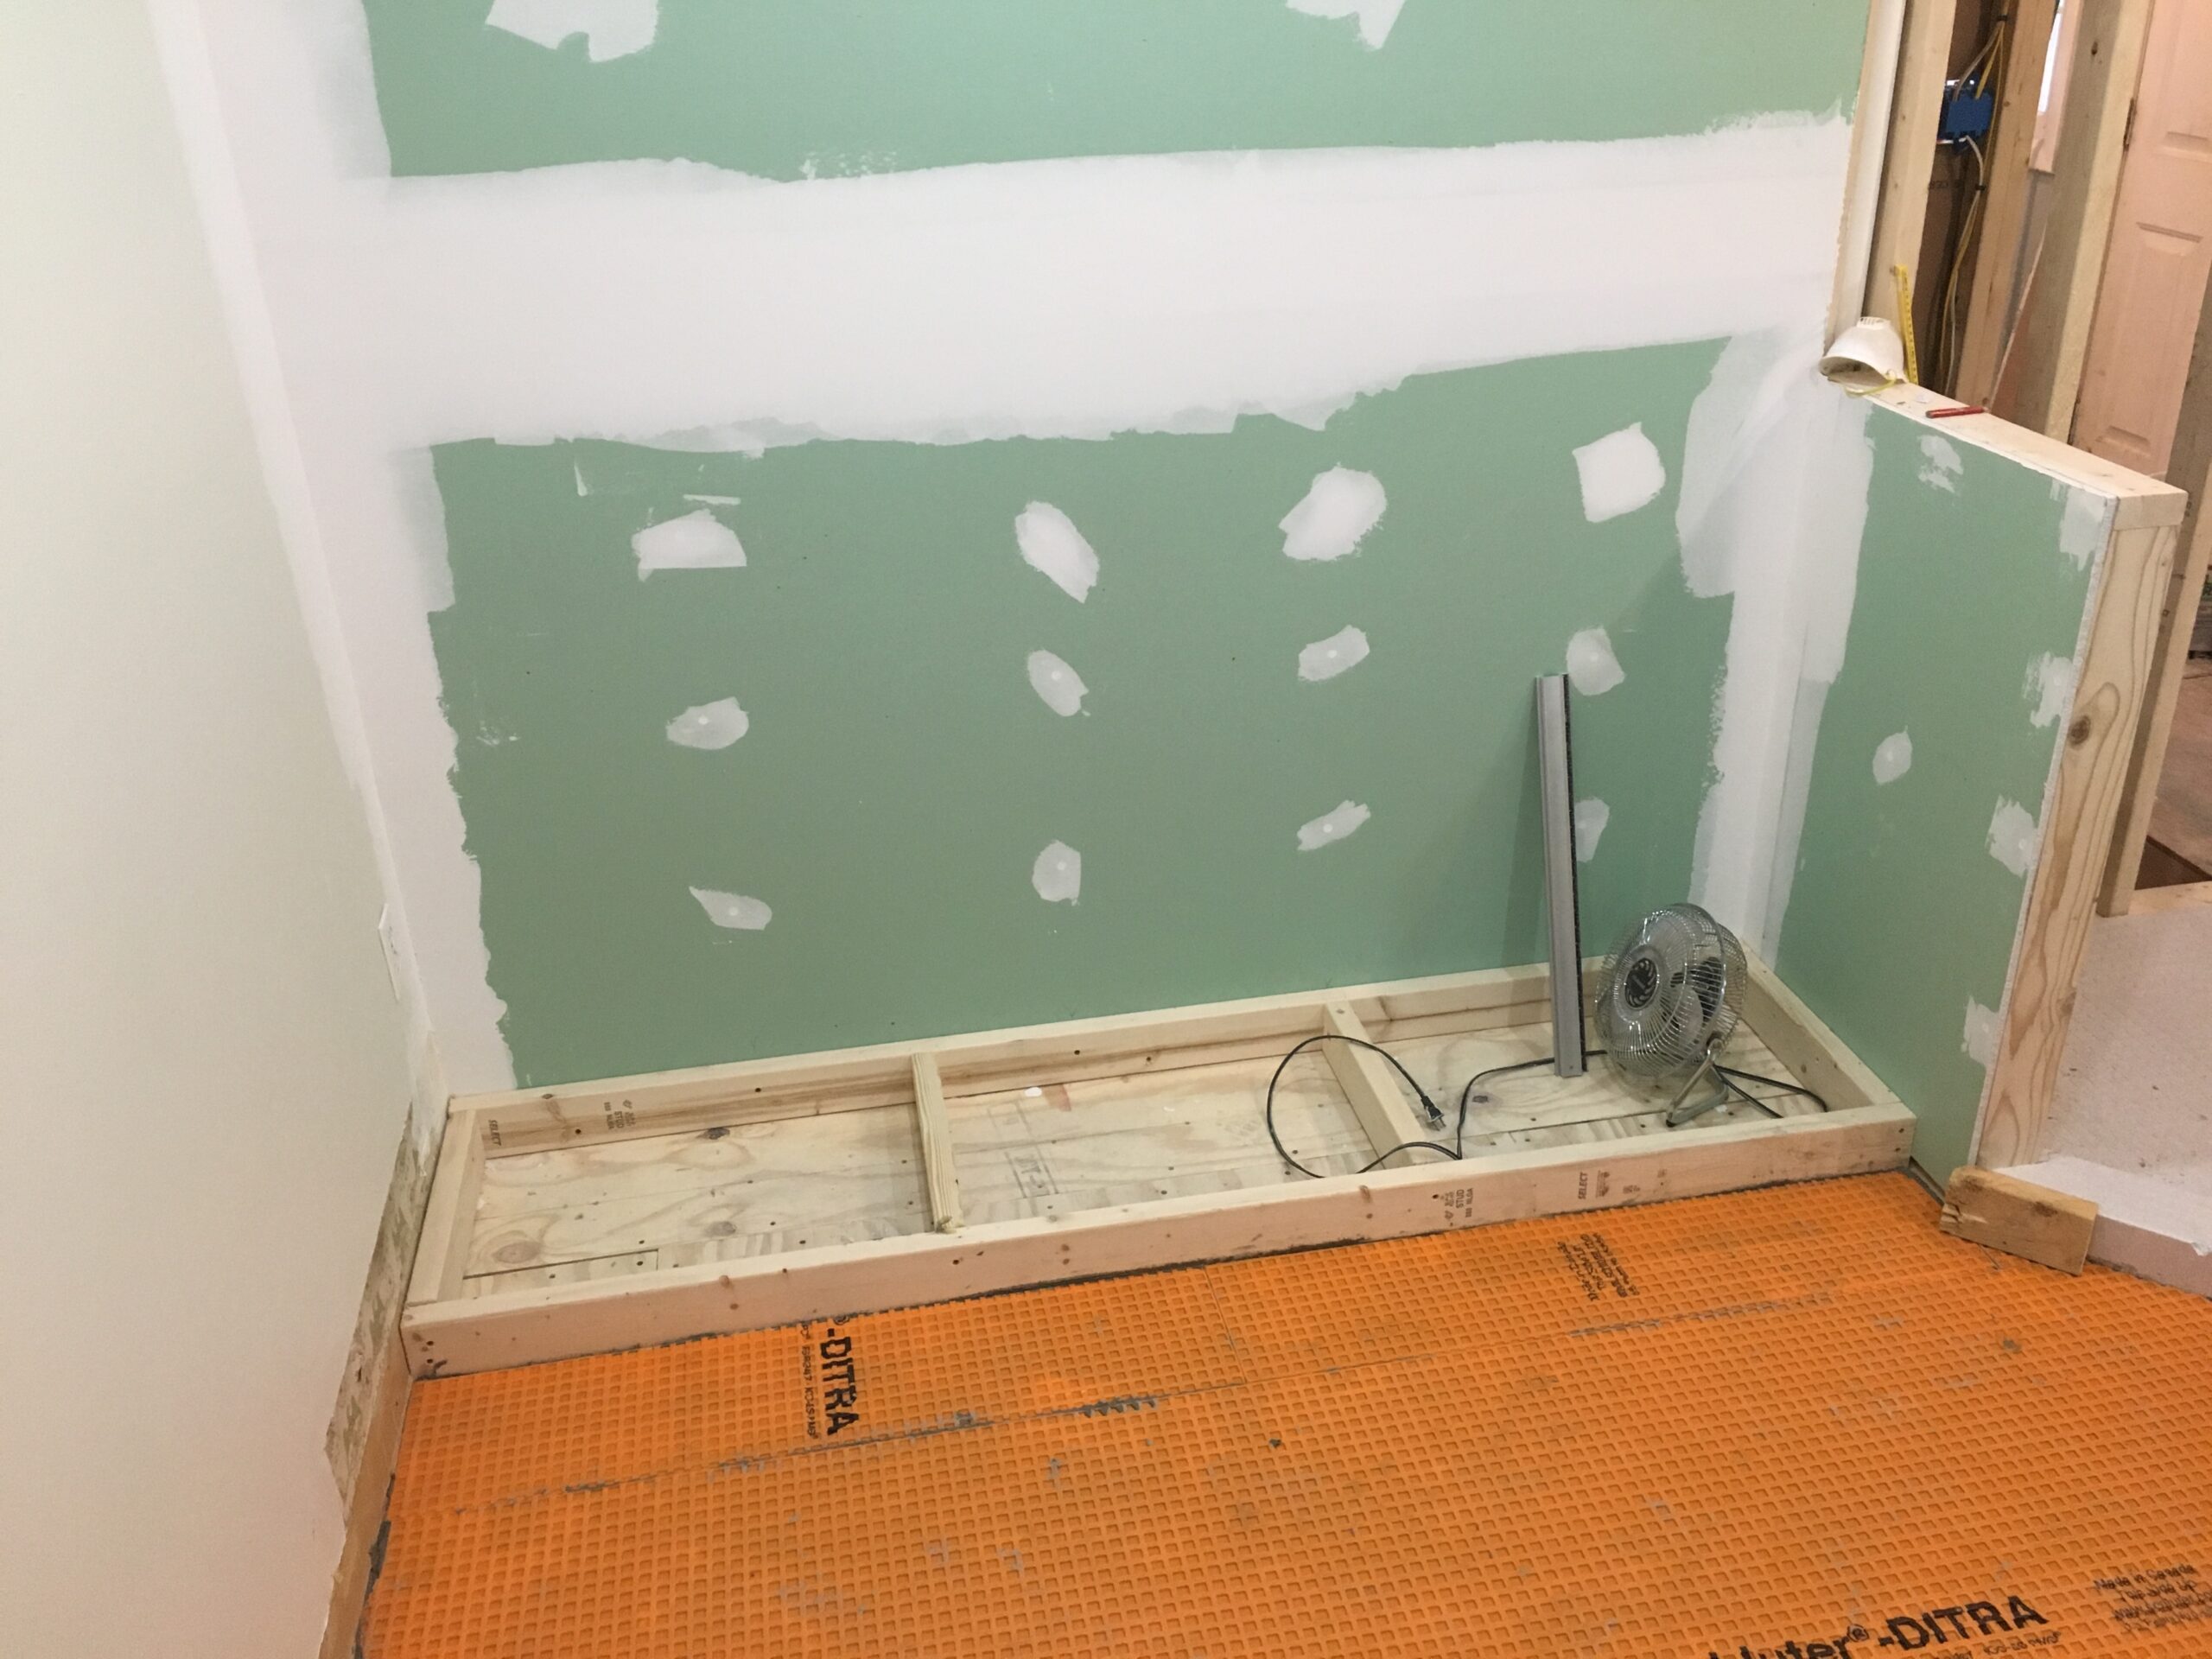
Vanity area (before base installed)

Vanity base

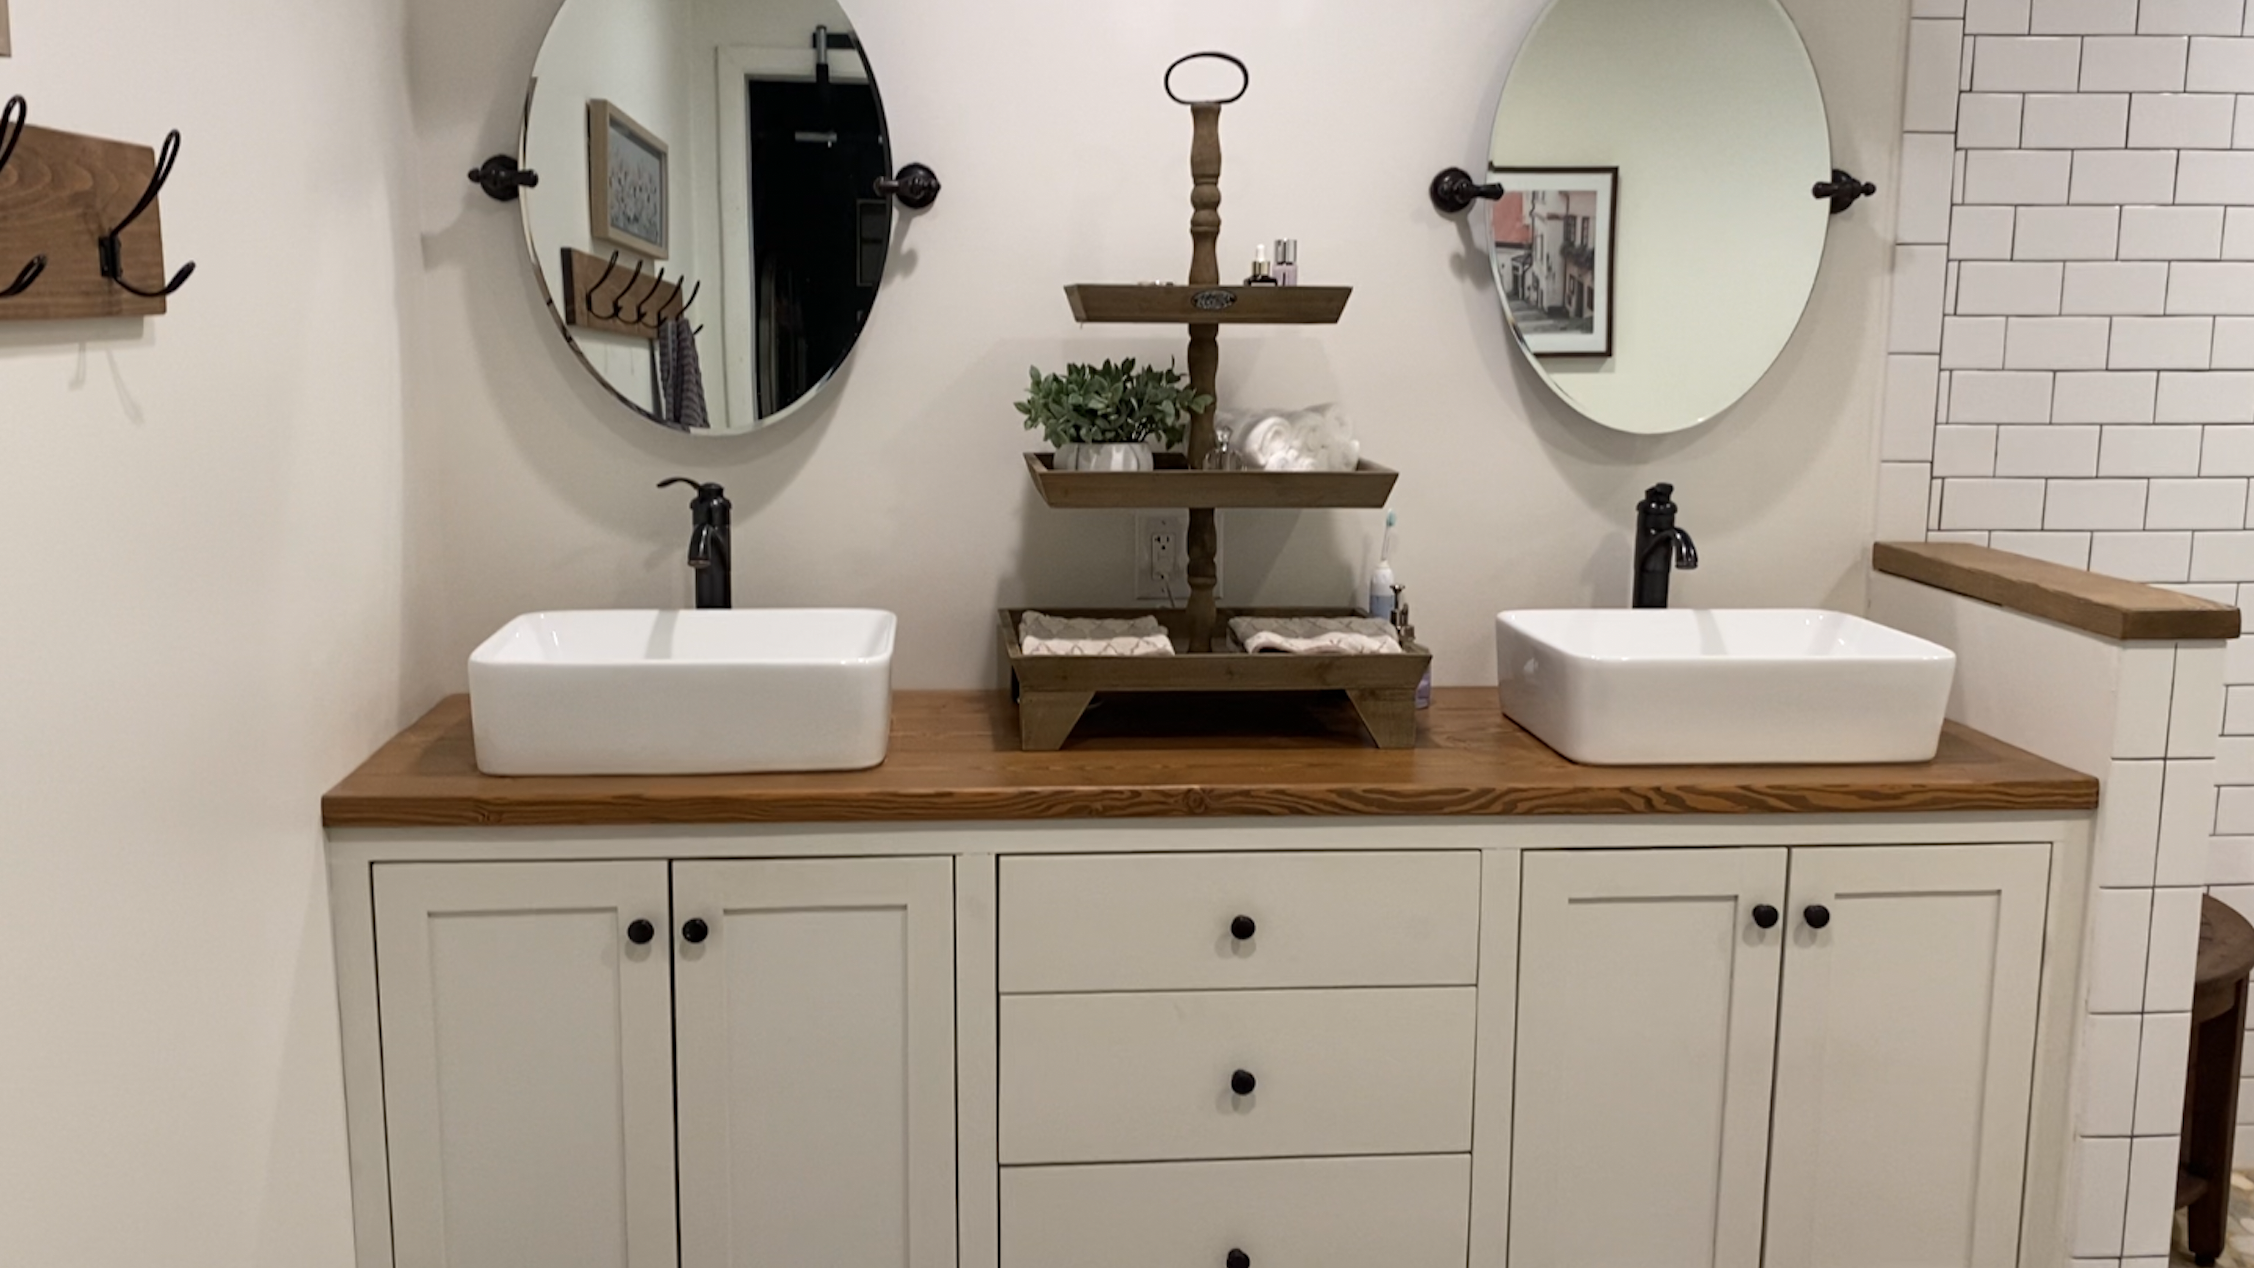
Vanity area with base installed.

Vanity base installed

This bathroom renovation like all DIY projects was a labor of love. I was pregnant with my second child at the time and dreamt of long soaks in my new tub. Like all of our projects I design the space and my husband brings it to life.

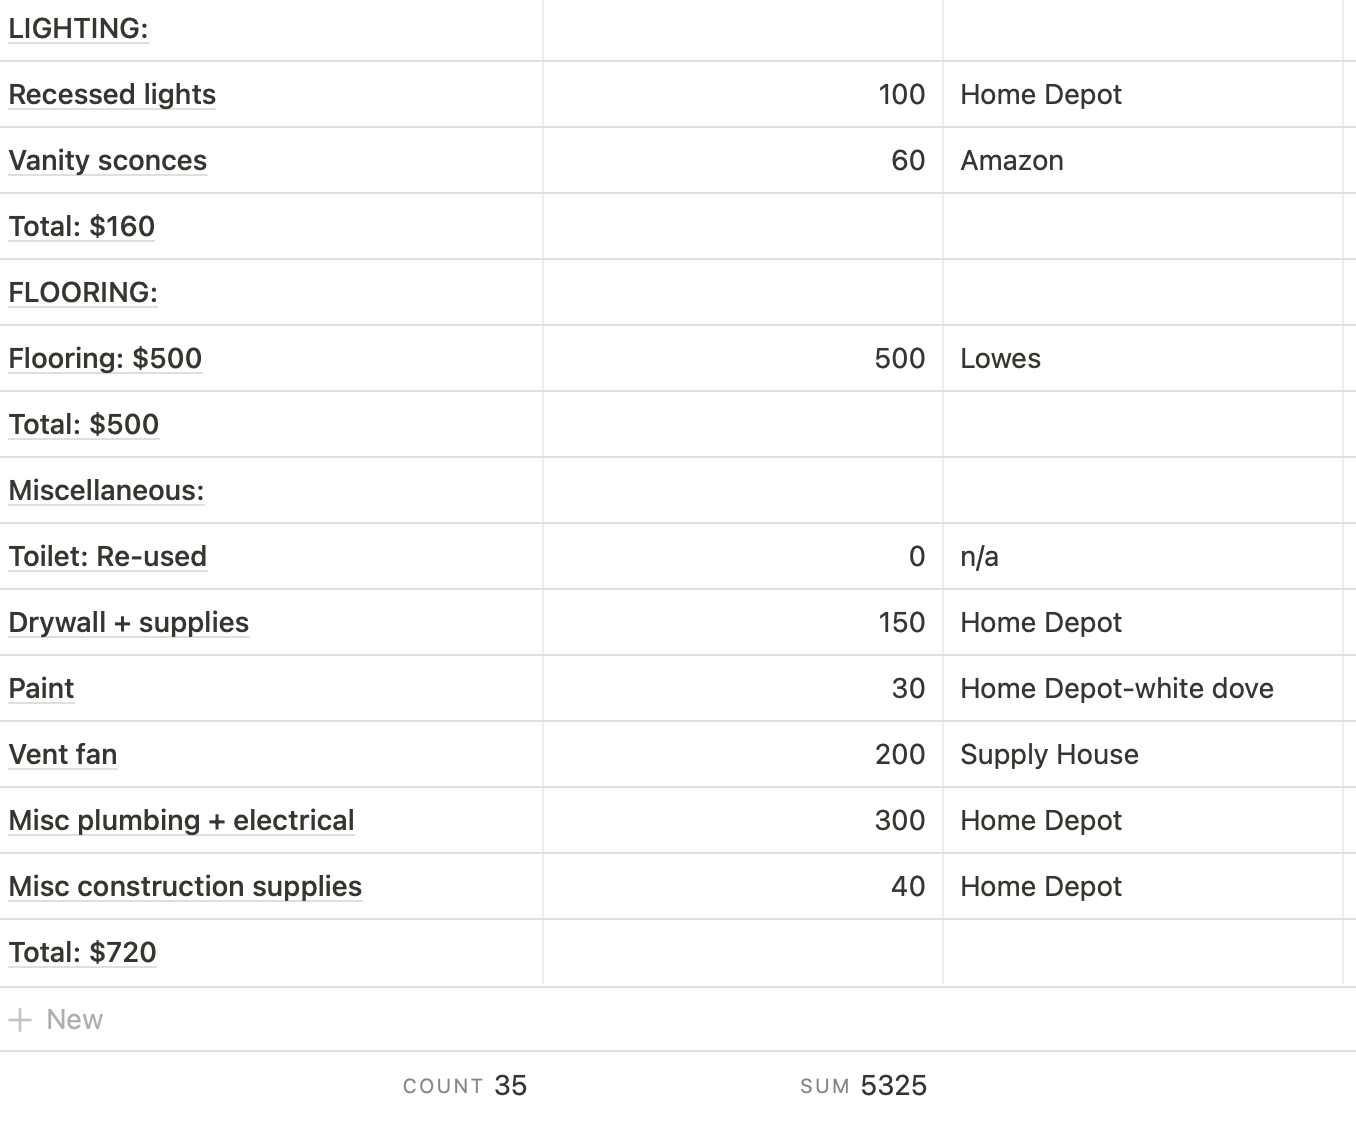
The biggest cost saver for this project was obviously the labor as we did it all ourselves. I was 8 months pregnant when we were finishing up so I was of limited assistance toward the end. Other cost savers was making things you would typically purchase like the vanity and the countertops.

Our vanity consisted of a base and framed out shell (pic earlier in this post) and homemade countertops. The cost of wood was about $100 (back when wood was affordable pre-pandemic 2018). My husband made the cabinet doors and the drawer fronts. It’s a simple design but more than meets our needs and looks clean.

Other ways we reduced our overall cost included: re-using the existing toilet, choosing a reasonably priced soaking tub we found on Amazon and modifying items ourselves. For example, the drawer pulls were twice as expensive in the oil rubbed bronze finish compared to a chrome finish. We purchased the chrome pulls and spray painted them the color of finish we wanted and they have worked out perfectly. This is a minor expenditure but each area of savings clearly add up.

Here is the rough cost breakdown and finished pictures below.

NOTE: THESE COSTS WERE BEFORE THE PANDEMIC. THE PROJECT WAS COMPLETED IN 2018. THE COST OF WOOD AND BUILDING SUPPLIES ARE CONSIDERABLY MORE CURRENTLY IN 2021.

After

Soaking tub
DIY towel rack

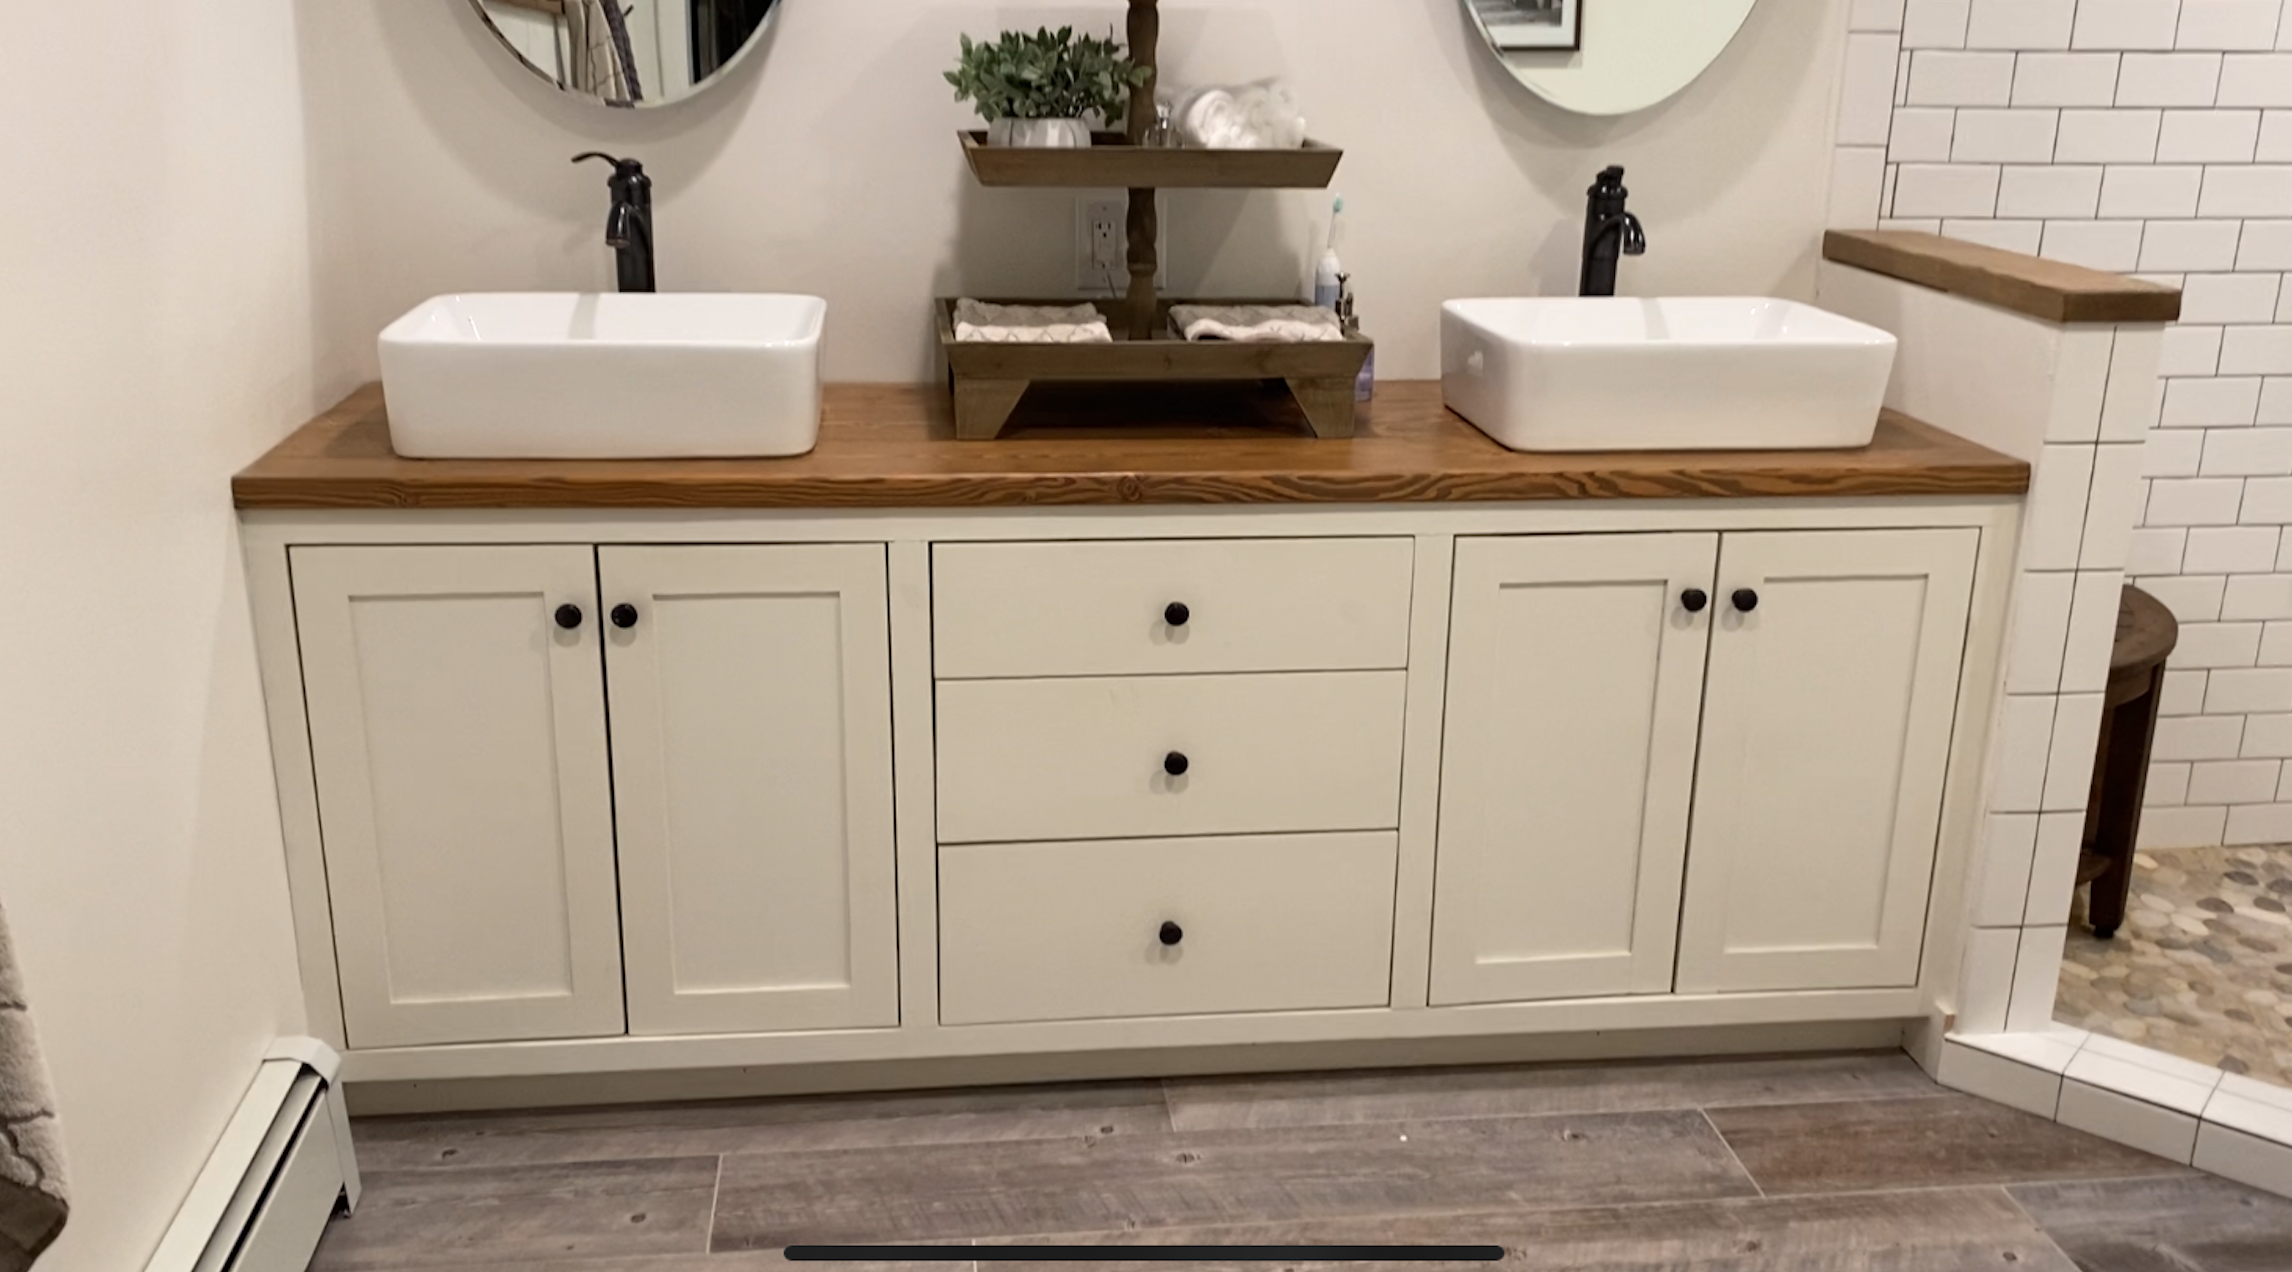
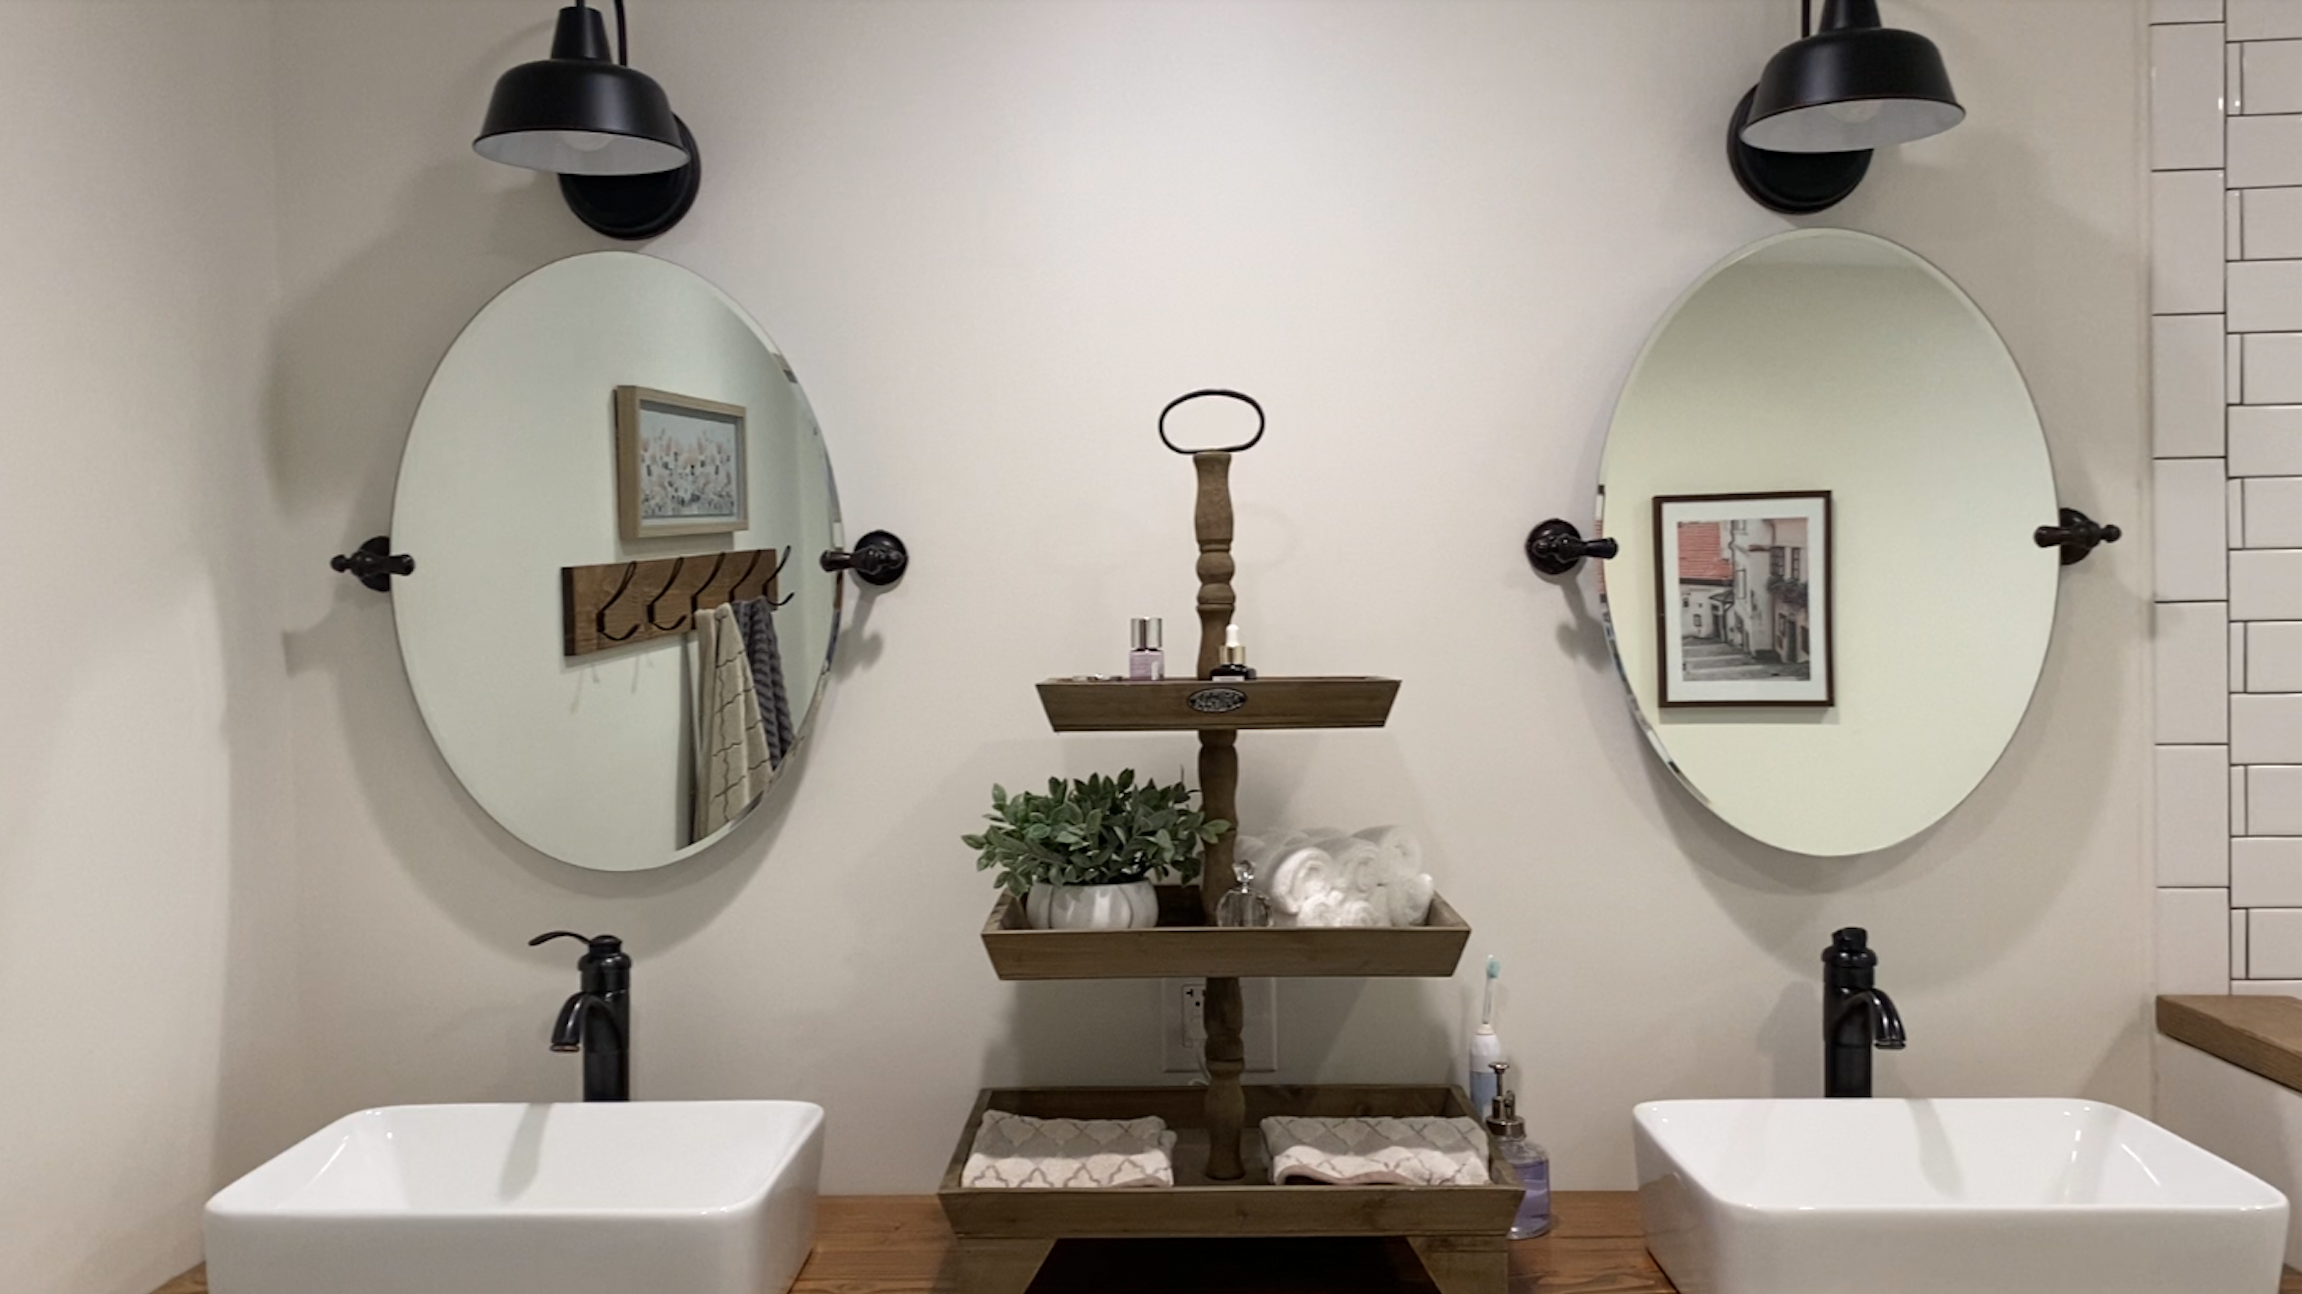
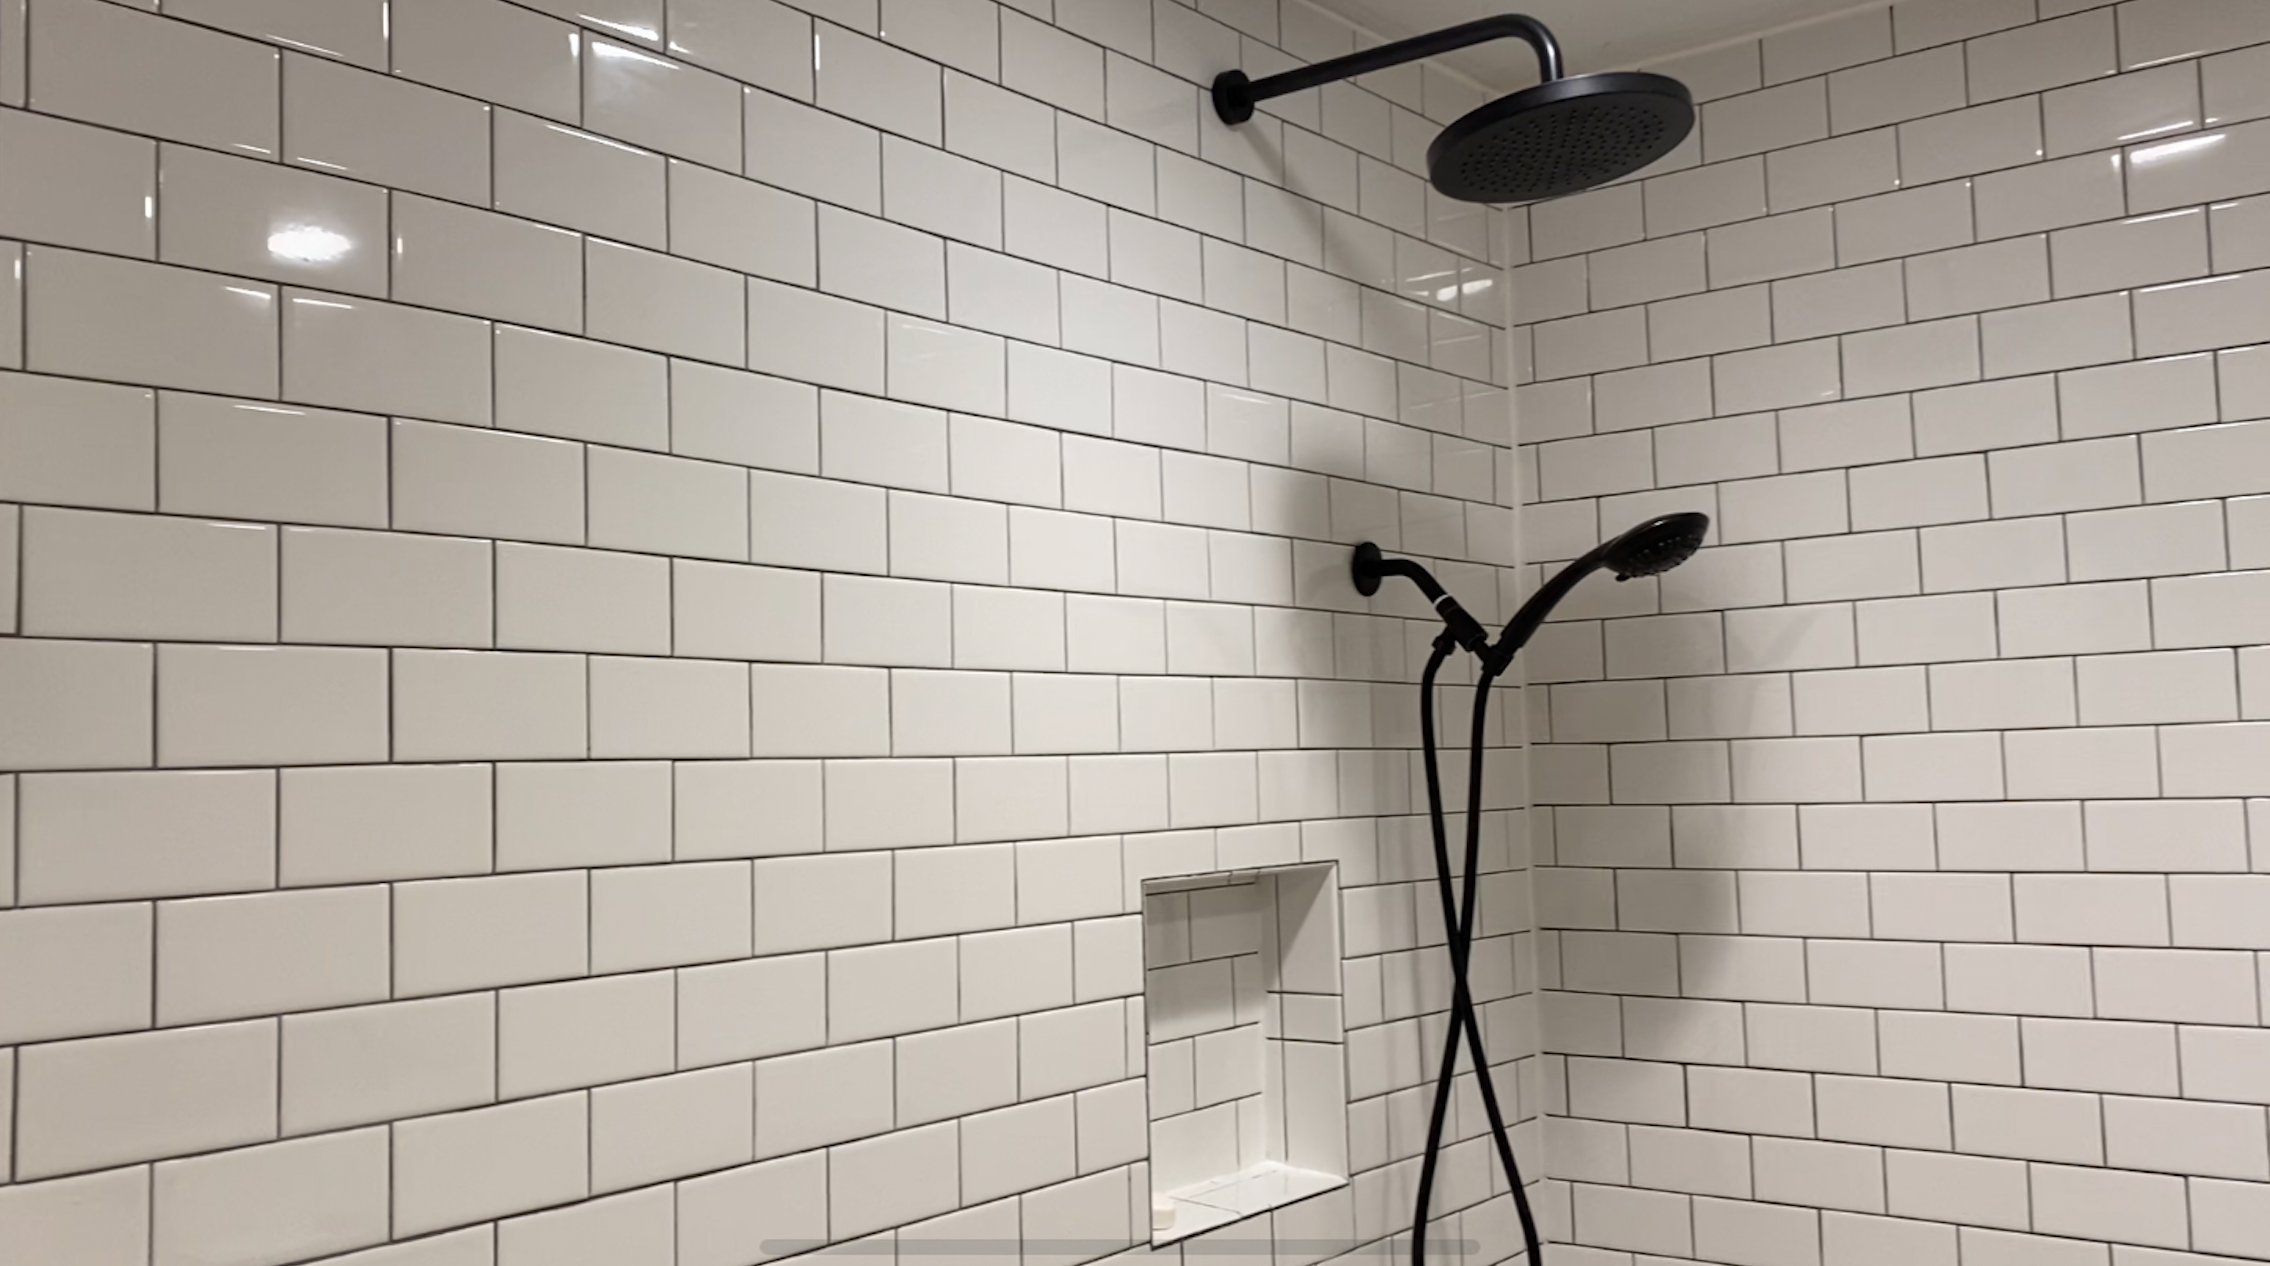
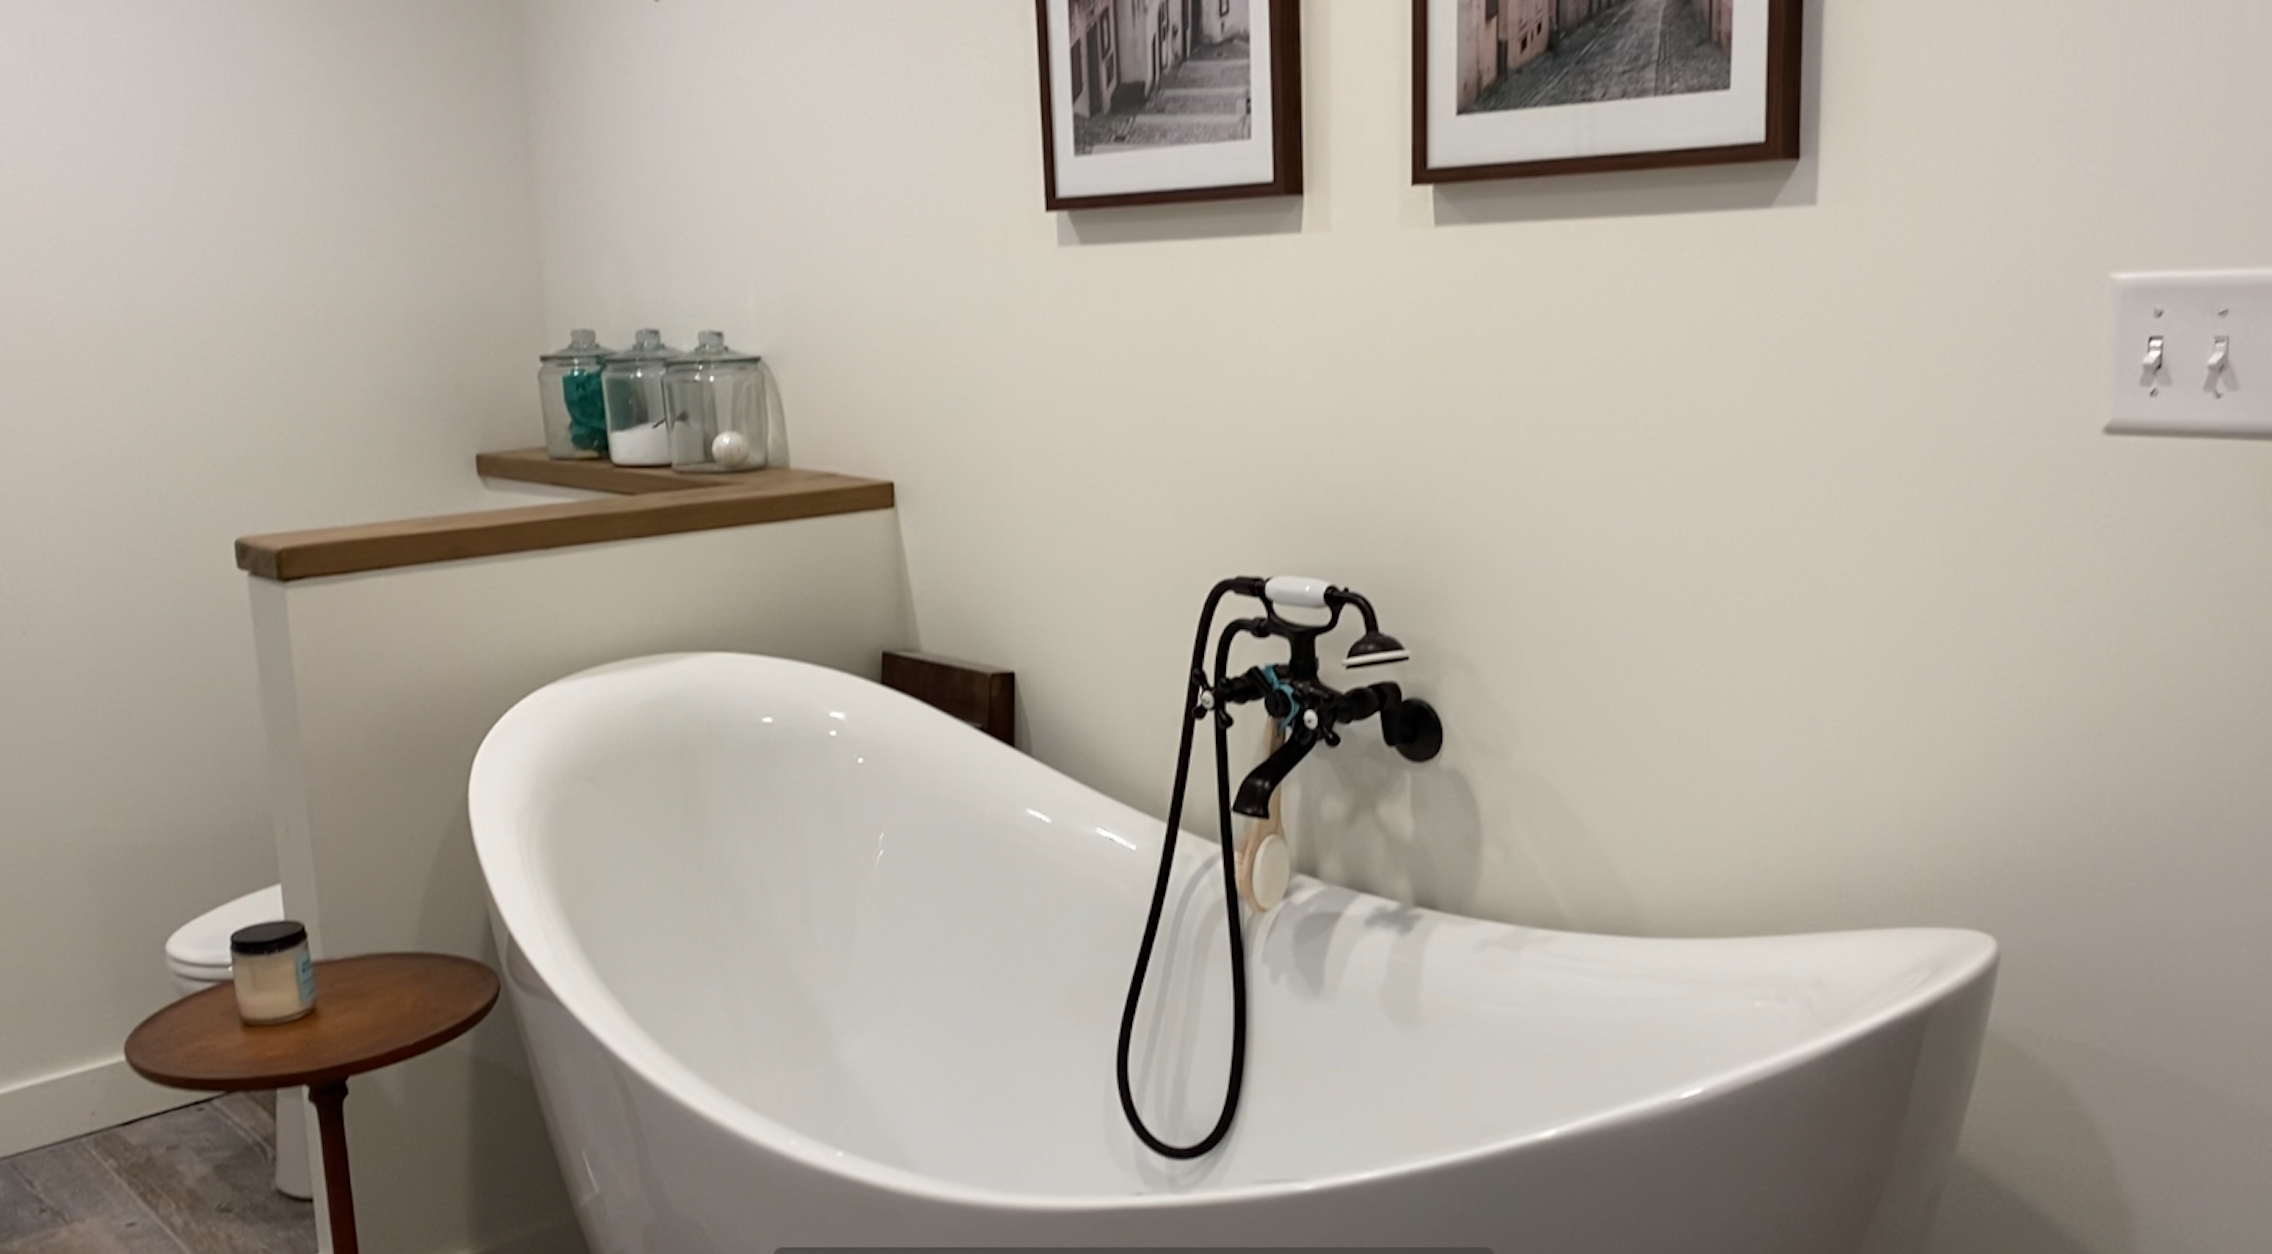
We are thrilled with the end product. It is a major upgrade from the original bathroom that was there and a very nice space by any bathroom standards.

Thanks for stopping by. More DIY projects to come!

2 shares

Filed Under: Farmhouse Tagged With: budget, DIY, farmhouse, master bathroom, renovation

White Ikea Ektorp furniture -4 years later

September 1, 2020 by Christina

2 shares

Today, I’m talking about my white Ikea Ektorp furniture and how I keep it white and clean 4 years later. With a big old farmhouse in all its historic charm I want furniture that is light and airy to brighten the living spaces. For me that means white living room furniture. With two young kids running around as well as an elderly lap dog, that might seem like a headache to try and keep dirt and dinginess at bay. I am living proof that it can be done!

Farmhouse style decorating tips with white furniture

The farmhouse craze is still going strong and though the trend is not the reason we purchased our historic home it helps that there is so much decor inspiration out there. In my experience styling and decorating our 1800s farmhouse I have learned a few things.

  1. You can’t go wrong with white.
  2. Take the time to find the right white (not too off-white and not too stark white) depending on if you’re talking about wall color or objects like furniture.
  3. Different wood tones can really complement a space especially if it is predominantly white or neutral color schemes.
  4. Keep rooms neutral and light for easier decorating and accessorizing.

Now back to the furniture. I’m going to tell you why I bought my white Ektorp sofa and two white Ektorp armchairs and how I have kept them in pristine condition the last four years. Most decorating enthusiasts are familiar with the Ektorp sofas from Ikea. Well, I am here to sing their praises. I love Ikea for many things from their organizing bins to kitchen gadgets and even garden planters.

I know Ikea is not everyone’s cup of tea but I’m going to tell you why I am a true believer for certain things during certain seasons of life. My style is modern farmhouse with a good mix of decor brands. I love Pottery Barn and Restoration Hardware and have many pieces from them but during this season of life with young kids, pets and busy lives I love the affordability and easy maintenance of the Ikea Ektorp line. These chairs and sofa were purchased four years ago when we moved into our 1800s historic farmhouse. I was reluctant with the white and despite everyone telling me I was crazy decided to go for it.

Reasons I chose Ikea Ektorp Furniture

First things first, the look. I knew I wanted white, comfy furniture and sitting options in the main living room. This room gets great light, has fun built-ins to decorate and is painted a creamy color to tie it all together–it is one of my favorite rooms in the house!

Secondly, I want furniture that is easy to clean. With a toddler, a newborn and a dog running around at the time they need to be cleanable. Thank goodness these Ikea Ektorp pieces are all slip-covered! These covers are easily removed, machine washable, bleach-able and replaceable.

Lastly, I love the flexibility of these pieces. If I should change my mind about the color of the furniture, color scheme in the room, configuration of the room or number of pieces I want in the room– no problem! Because they are slip-covered I can purchase different color covers or replace an existing slip cover should something catastrophic happen.

Care

  1. Remove all cushion covers and slip covers
  2. Machine wash warm. If your covers are white add bleach as instructed by your washing machine. (you may need to do multiple loads to give ample space in the machine).
  3. Tumble dry low until slightly damp
  4. Reassemble onto furniture and cushions
  5. Bonus: Use scotch guard on heavily trafficked areas for extra stain protection.
Keeping white furniture clean and white.
Ikea Ektorp white sofa
White Ikea Ektorp furniture 4 years later

Tips

  1. I went for 1 sofa and 2 arm chairs instead of 2 sofas so I would have more configuration options.
  2. With young children I allow snacks in that room but limit the type of snack. I try not to give things that could melt and smear on their hands like chocolate or peanut butter. Think things like gold fish crackers, apple slices or veggie straws.
  3. Invest in a back up slipcover to have on hand. This way if Ikea should ever discontinue your color or adjust their design you have practically a brand new piece of furniture with the new cover(s).
  4. I recommend washing (and bleaching if your covers are white) seasonally. This routine has kept mine looking perfect four years later.
  5. Use scotch guard for added stain protection.
  6. Common sense tip: with small kids make it a habit to wash hands immediately after meals, messy snacks and coming in from outdoor play. It will minimize the chances that kids will touch the furniture with dirty hands. Same with pets make it a habit to wipe pets paws with a damp cloth when coming in from outside.

I highly recommend these furniture pieces. I DO NOT regret the white. If anything I love it more the longer I have it. So flexible and versatile. Easy for seasonal decorating as well. If you want white furniture then get white furniture! Don’t let fear stand in your way!

-Christina

–

2 shares

Filed Under: Farmhouse, House Tagged With: country life, farmhouse decor, farmhouse living room, farmhouse style, Ikea Ektorp chair, Ikea Ektorp sofa, Korean Adoptee, new england, white furniture

Primary Sidebar

  • Facebook
  • Instagram
  • Pinterest
  • YouTube

Hi! I’m Christina,

I am a Korean Adoptee with New England Roots! Living and Loving New England Country Life while raising our babies and restoring our 1820s Farmhouse.  Homesteading and Farmhouse Inspiration. Coffee and Tea Lover. Book Addict.

Grab a cup of tea and stay a while!

Recent Posts

  • Korean Adoptee: I lost my mom to Alzheimer’s Disease December 8, 2023
  • Can a baby monitor prevent SIDS? Reviewing the Miku Pro Baby Monitor March 16, 2023
  • Is this the best baby product ever? March 9, 2023

Archives

  • December 2023
  • March 2023
  • February 2023
  • September 2021
  • February 2021
  • January 2021
  • October 2020
  • September 2020
  • May 2014
  • April 2014
  • March 2014

Copyright © 2025 My New England Seoul on the Foodie Pro Theme